ThingRex IoT Lab
Overview
Starting the Internet of Things (IoT) journey might be intimidating. IoT is not a “single thing” but a blend of multiple technologies and concepts.
The ThingRex IoT Lab offers a pre-configured learning environment designed to help you dive into the exciting world of the Internet of Things without the hassle of setting up development tools.
I created this Lab for people interested in learning about the Internet of Things and building IoT solutions leveraging the AWS Cloud.
Using this Lab, you can learn the foundational skills required in IoT:
- MQTT protocol
- handling Private Keys and X.509 Certificates
- management of AWS Cloud infrastructure using:
- AWS Command Line Interface (AWS CLI)
- AWS SDK for Python (Boto3)
- AWS Cloud Development Kit (AWS CDK)
- basics of the Linux terminal
The ThingRex IoT Lab is free to use. You can modify it according to your needs.
I use this lab during my training sessions.
Requirements
The only requirement is an AWS account and a web browser.
Setup
AWS infrastructure costs notice
The ThingRex IoT Lab runs on the AWS SageMaker Notebook instance ml.t2.medium that generates hourly costs:
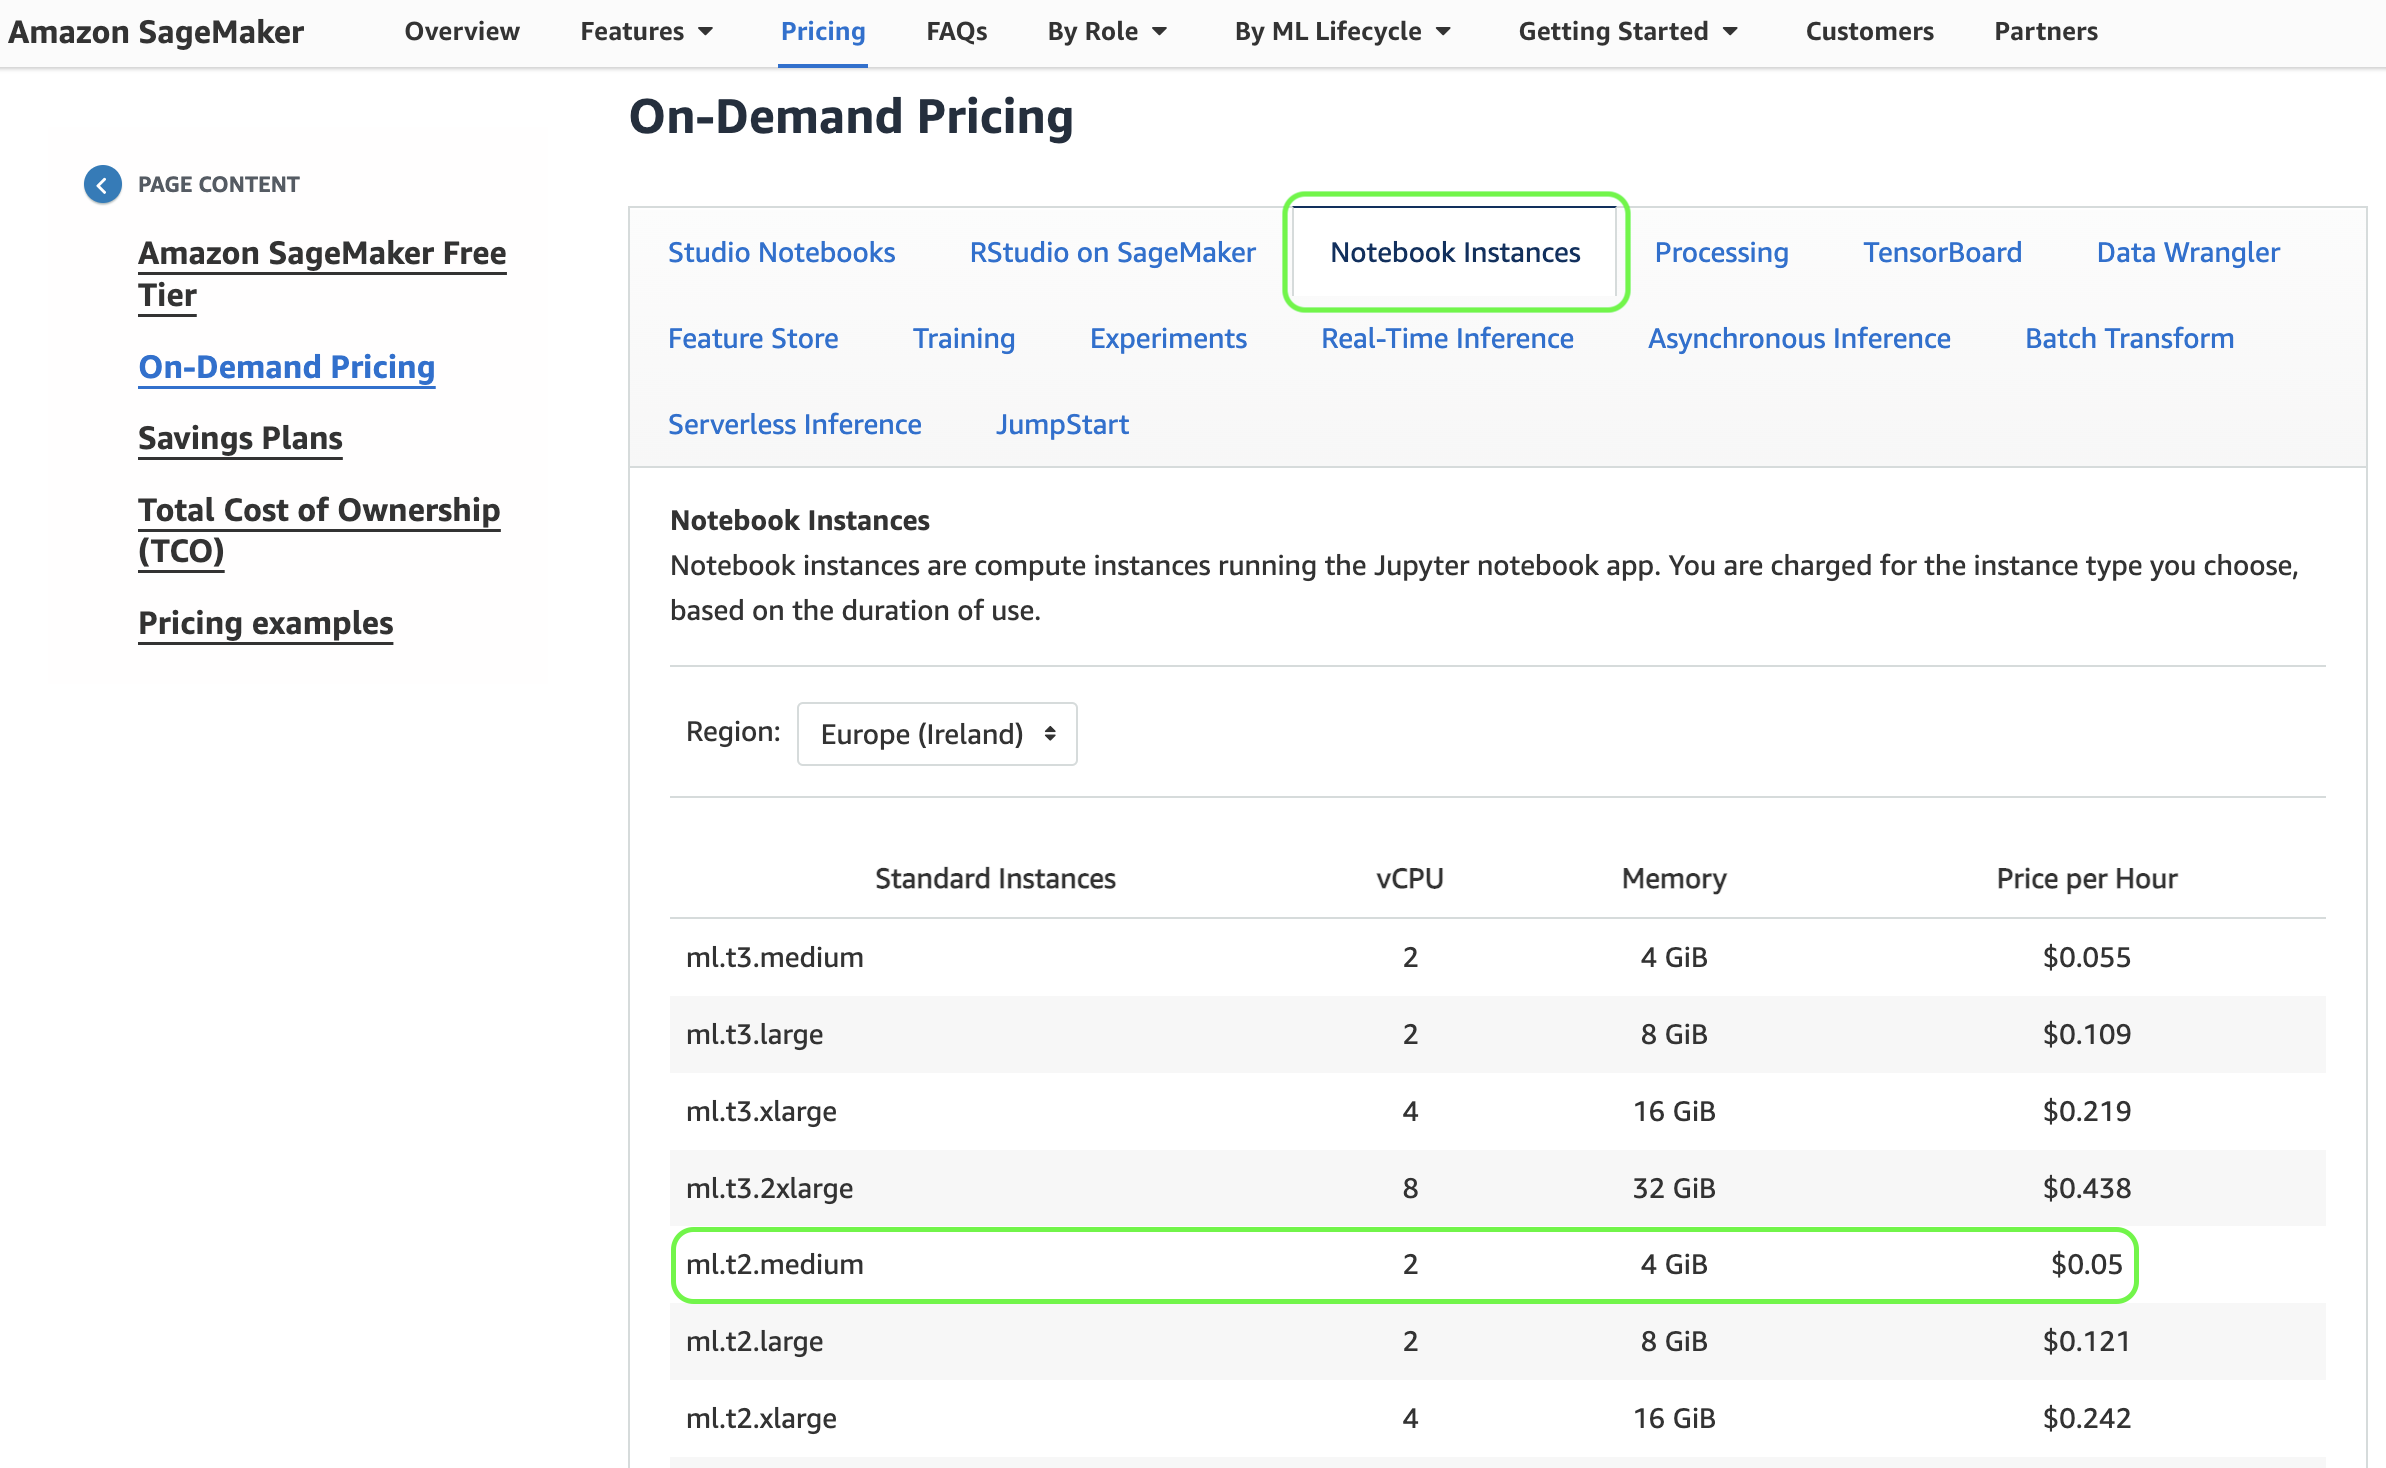
Please check the current AWS SageMaker pricing at: https://aws.amazon.com/sagemaker/pricing/
During the IoT training, you will mainly interact with the AWS IoT Core service.
Please check the current AWS IoT Core pricing at: https://aws.amazon.com/iot-core/pricing/
AWS infrastructure setup
1 ) Log into your AWS account and search for the CloudFormation service:
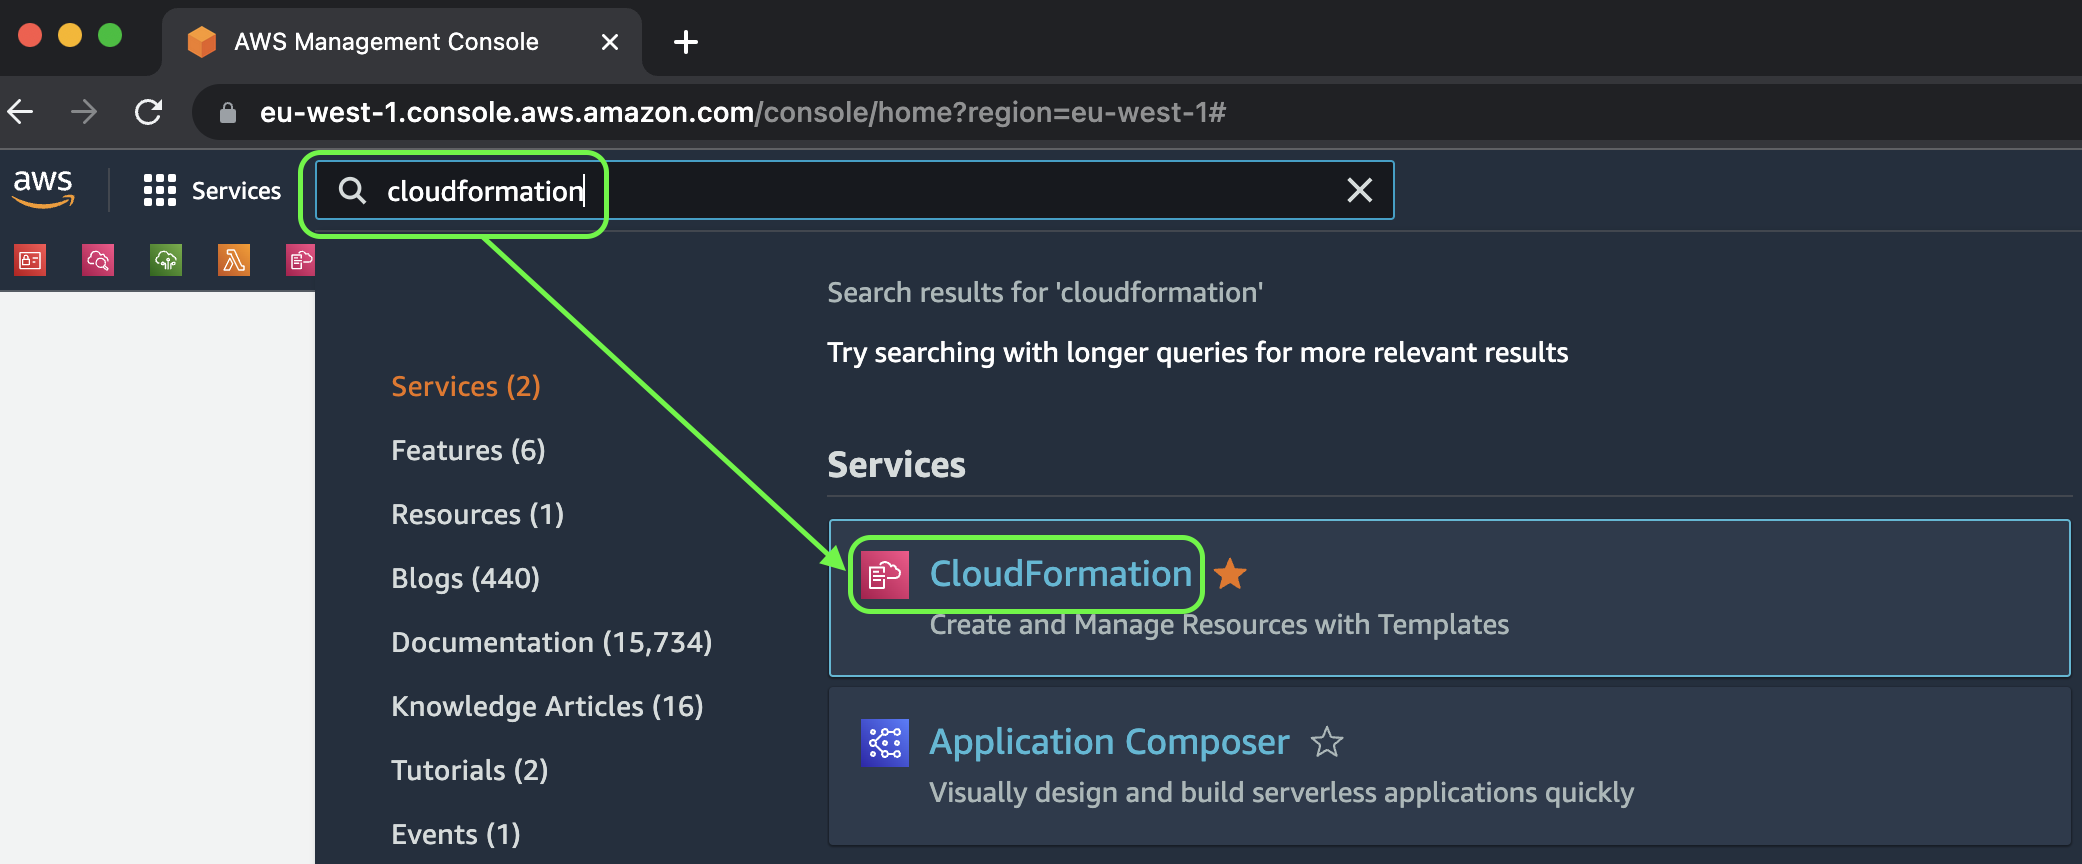
2 ) Create a new stack to deploy the ThingRex IoT Lab infrastructure (use the “With new resources” option):

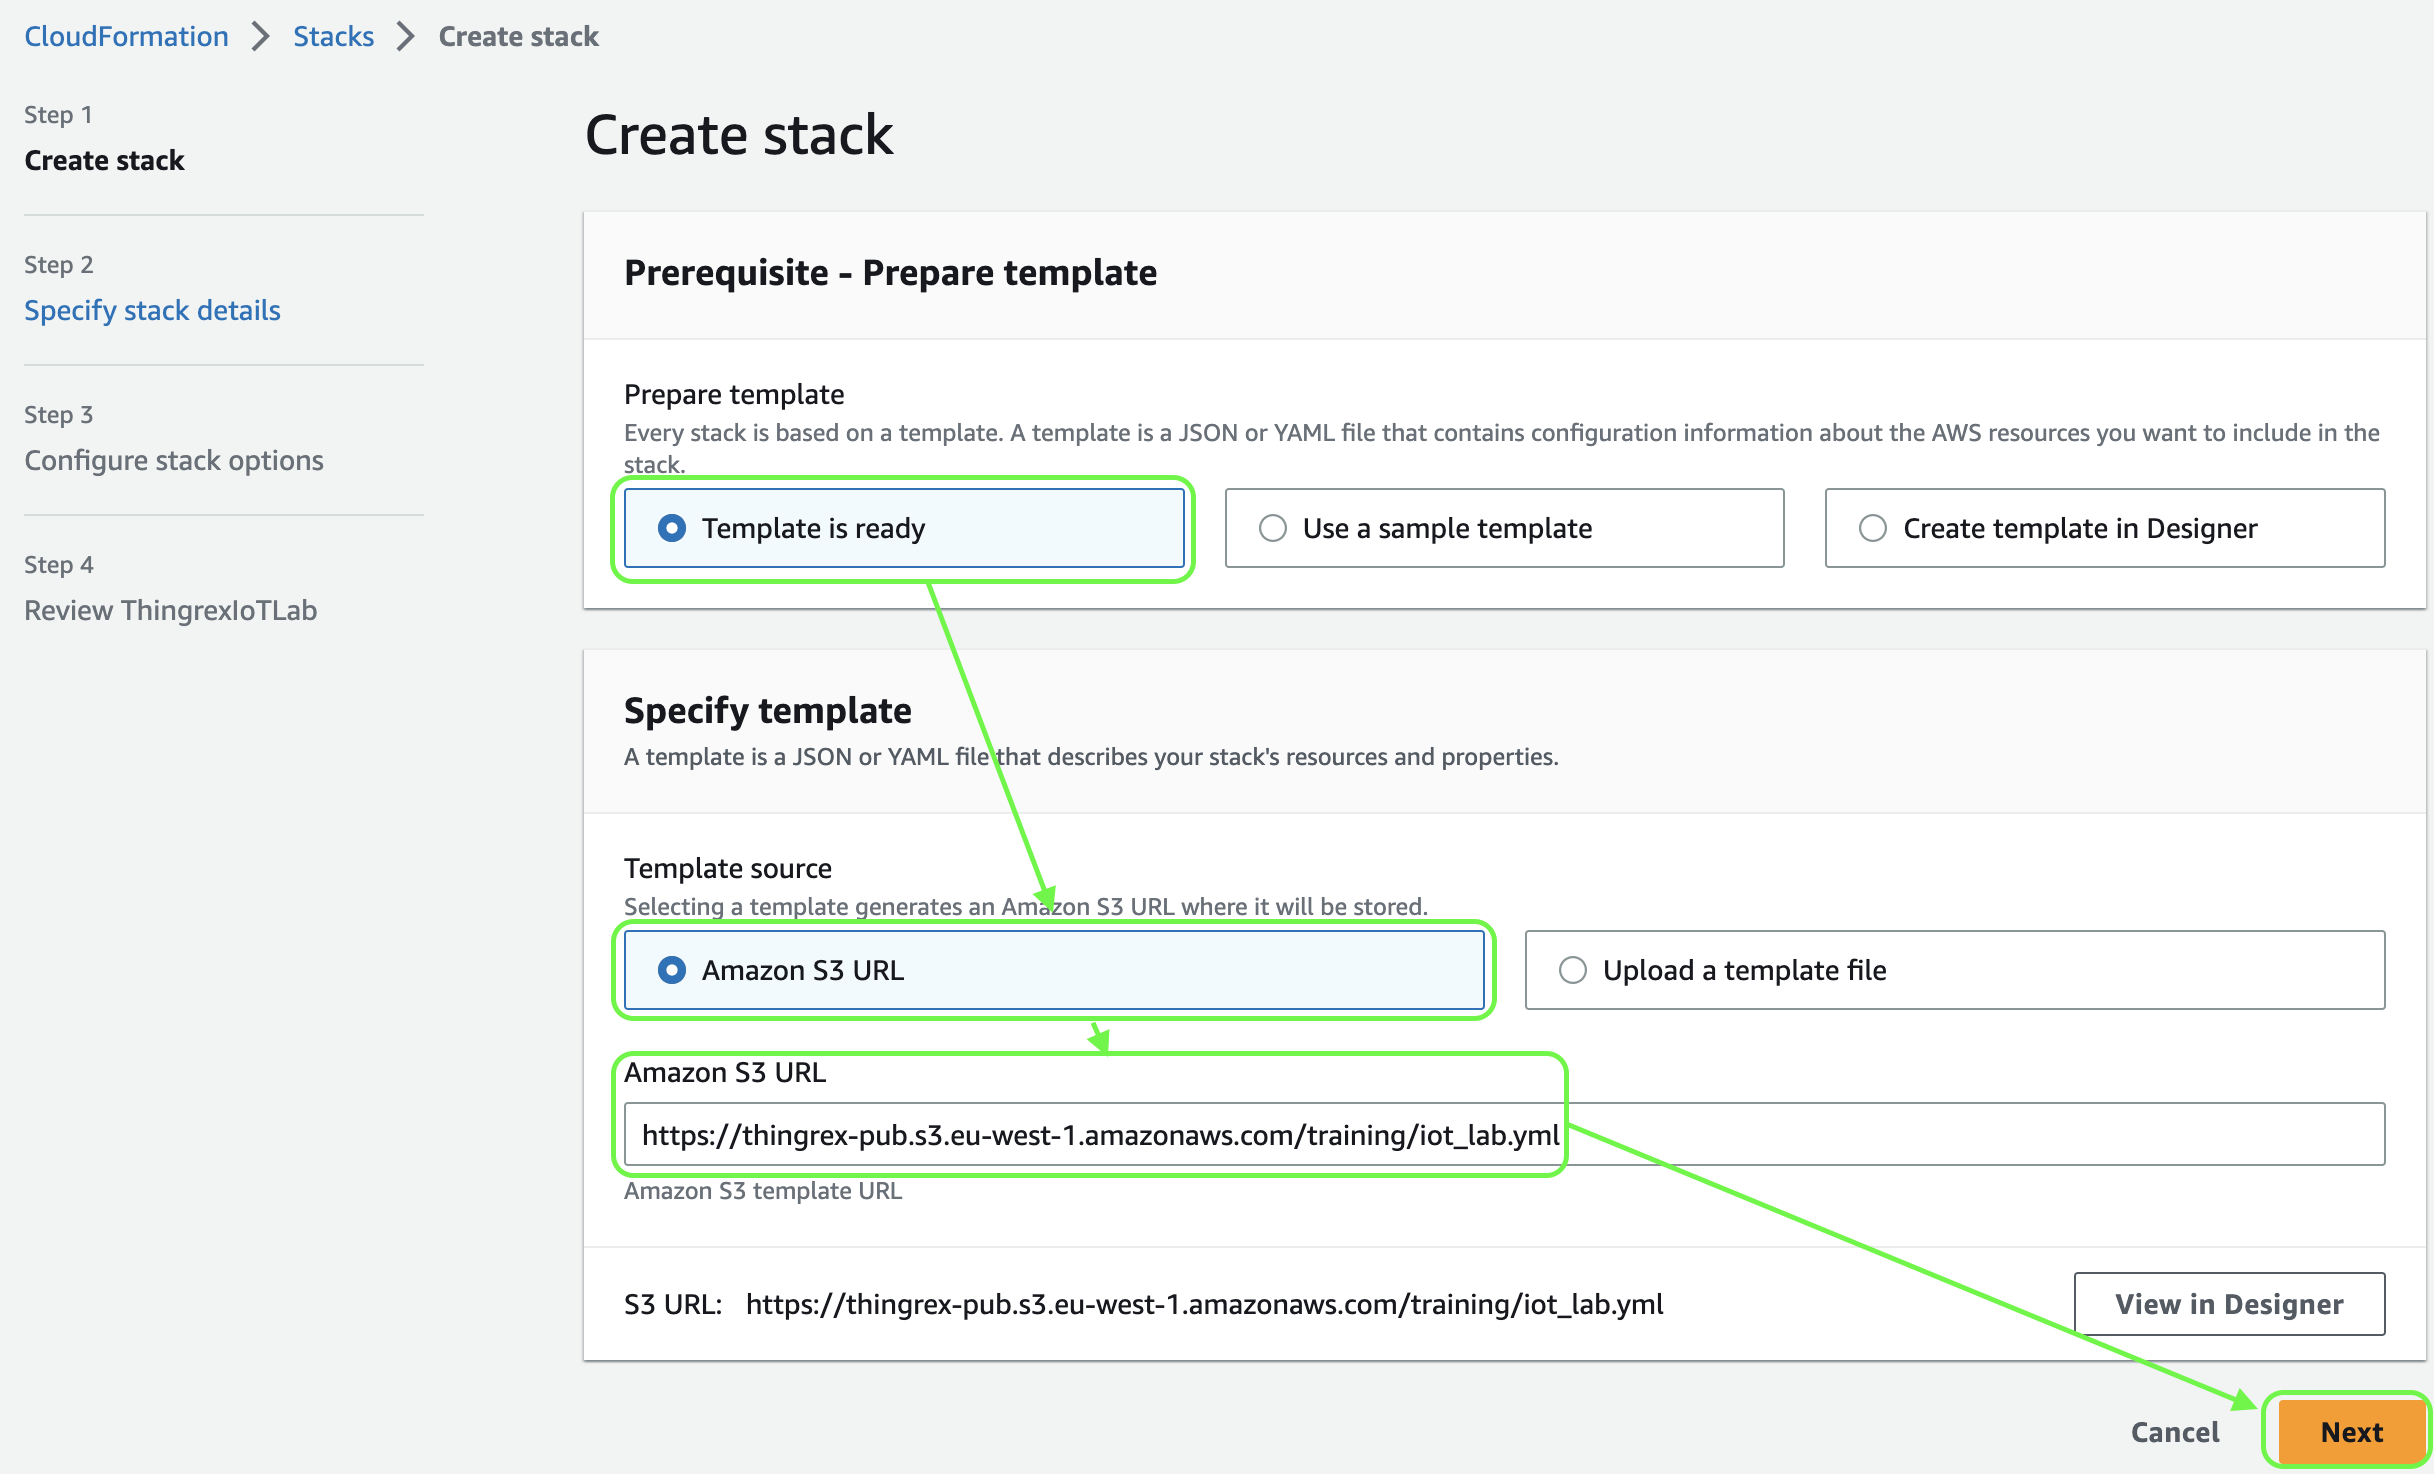
3 ) Leave the default options for “Prepare template” and “Template source”.
Use the following link as the Amazon S3 URL:
https://thingrex-pub.s3.eu-west-1.amazonaws.com/training/iot_lab.yml
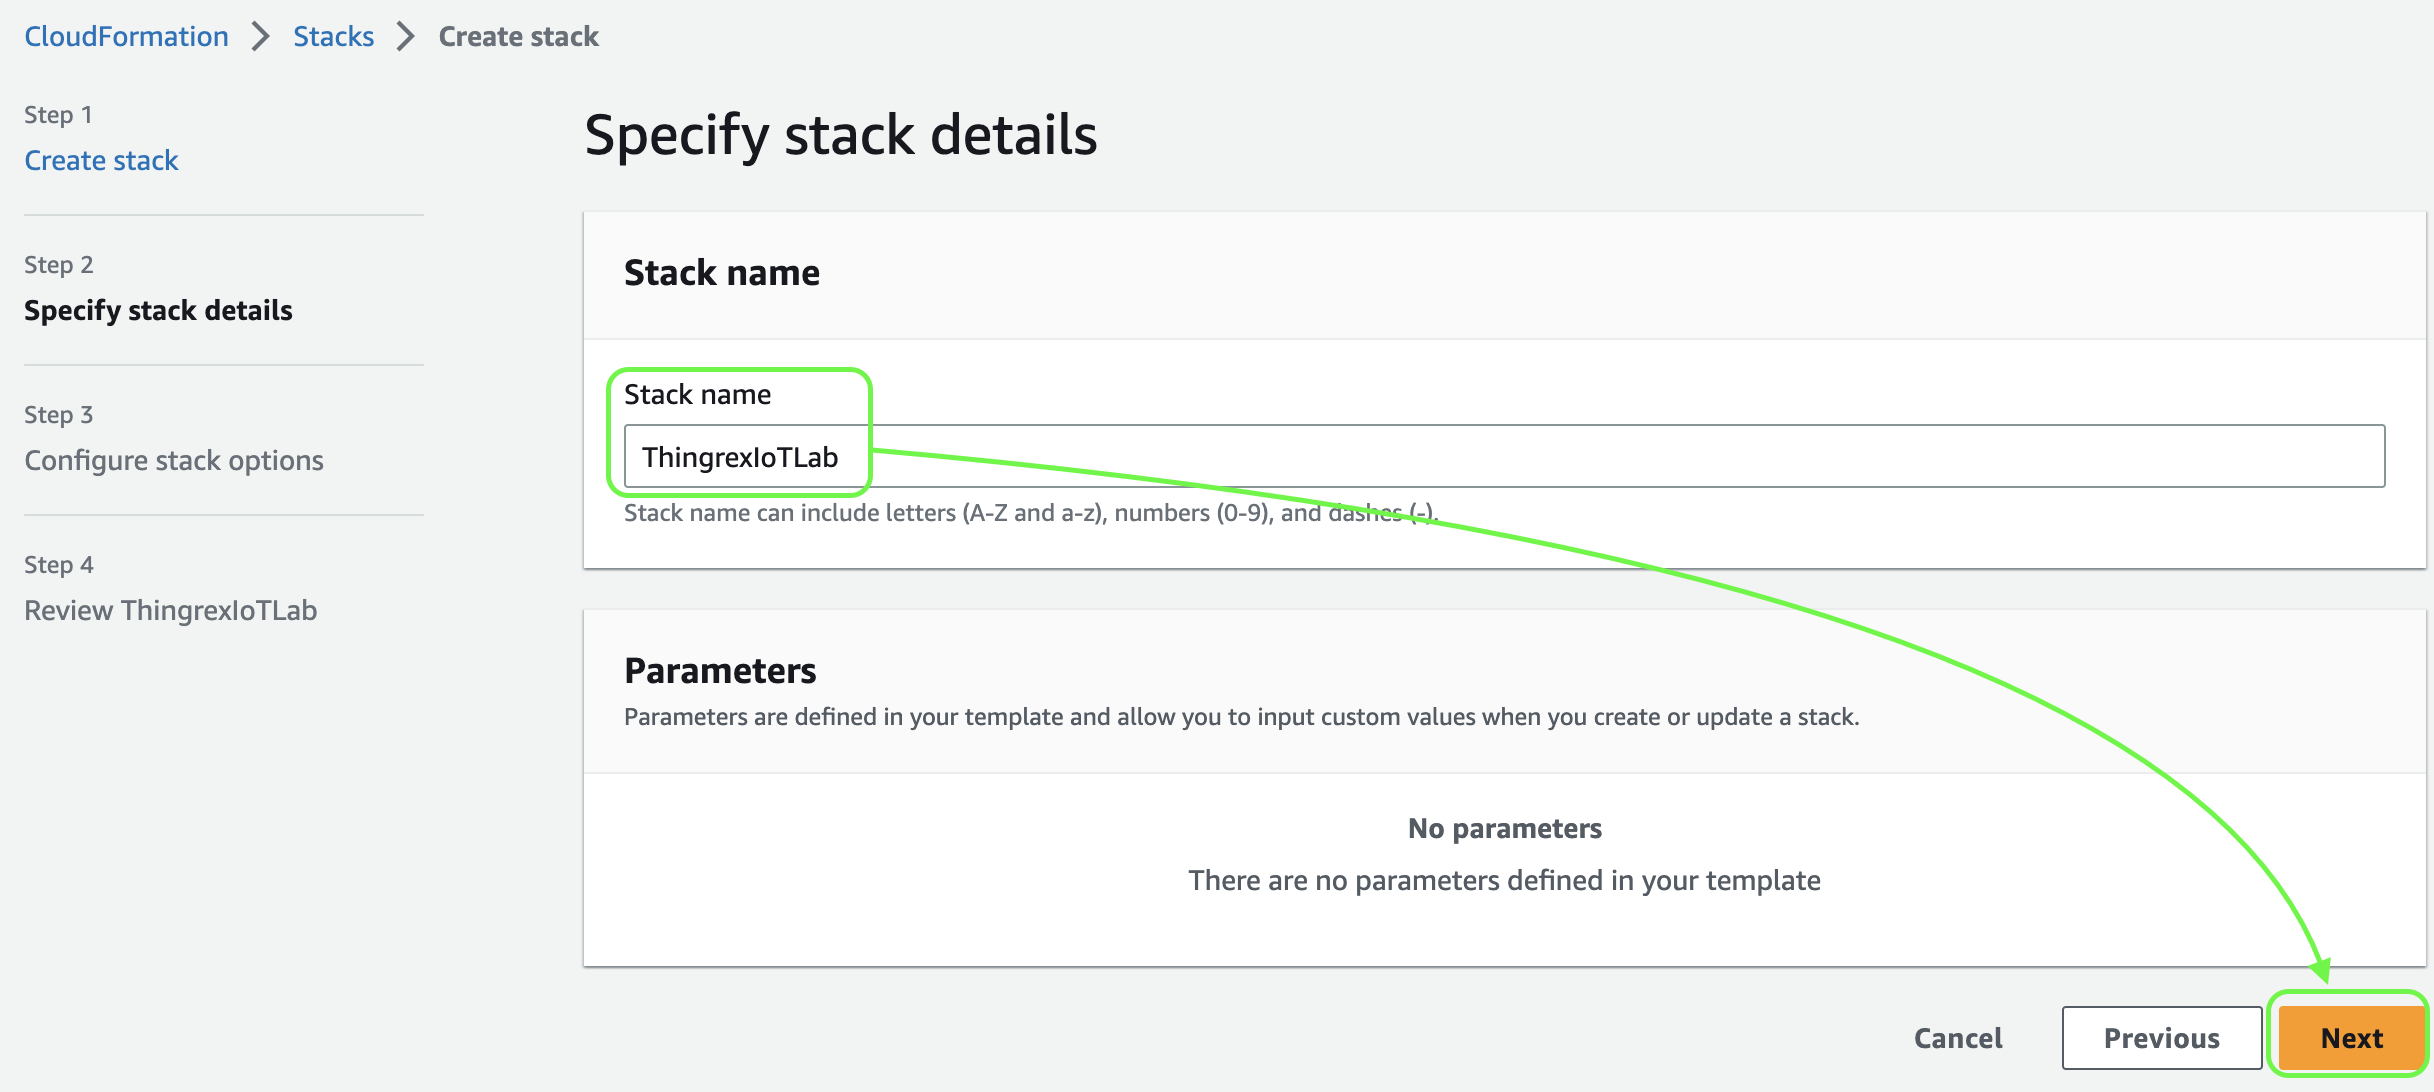
4 ) Choose a name for your stack (for instance, ThingrexIoTLab):
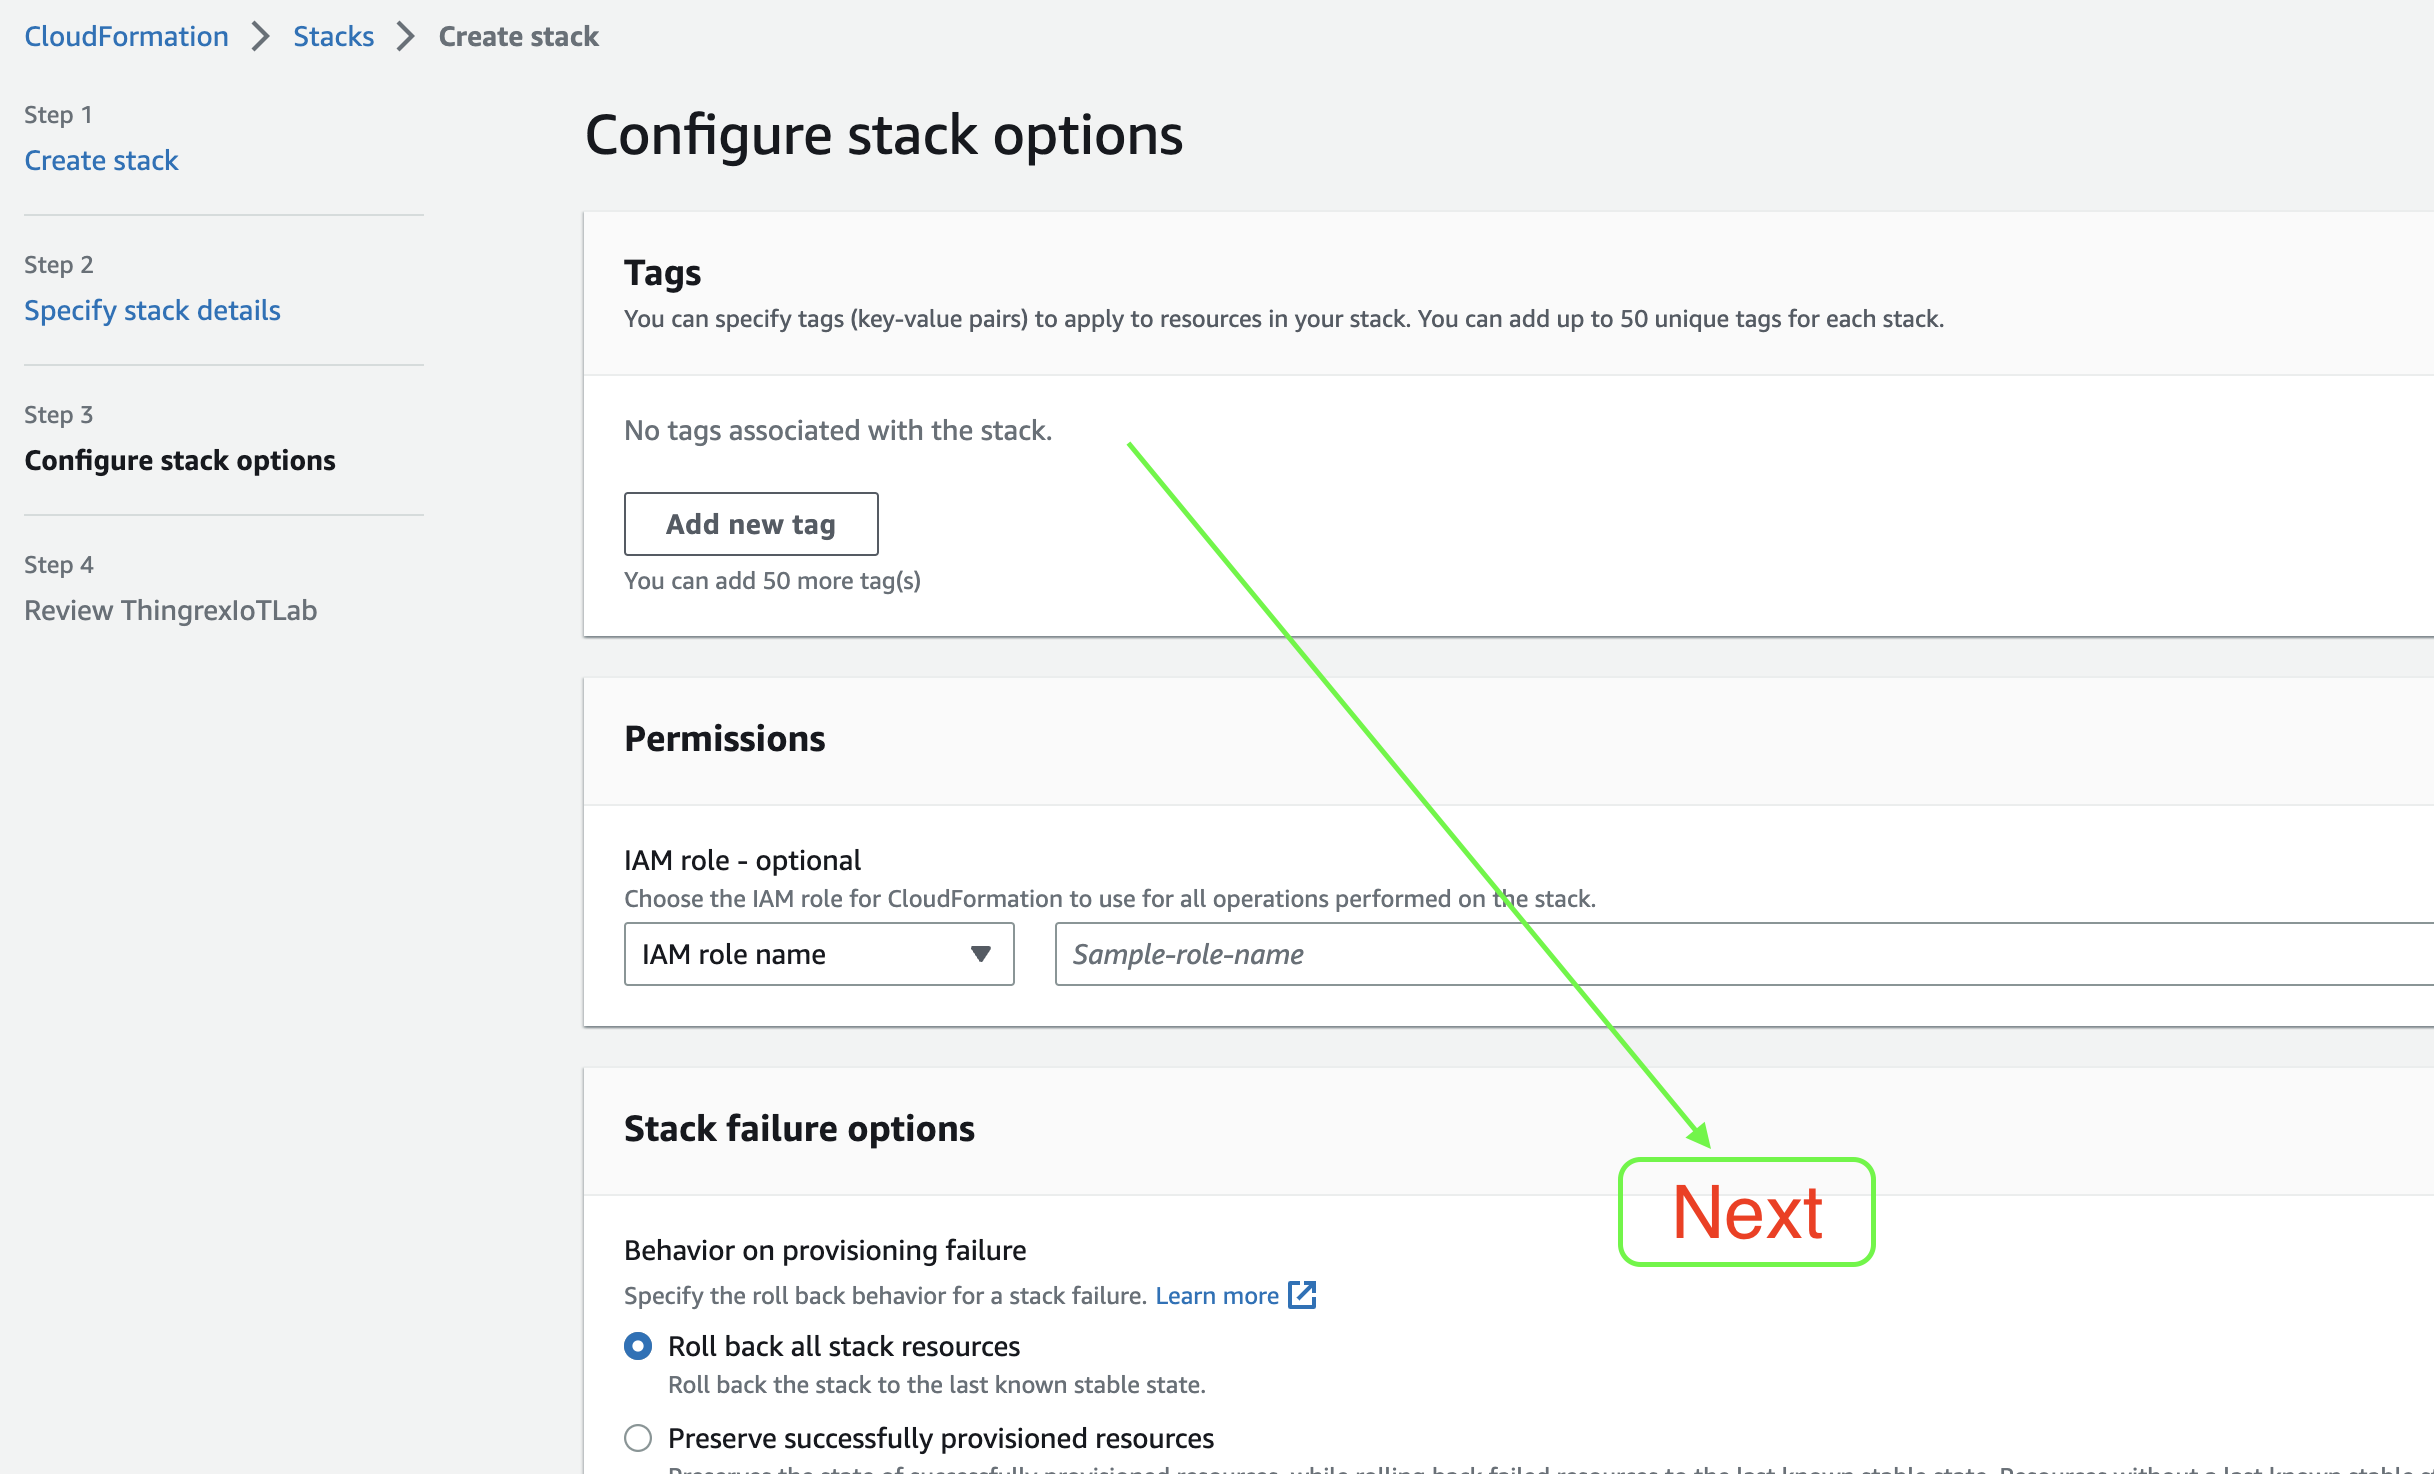
5 ) Scroll to the bottom of the “Configure stack options” page and hit Next:
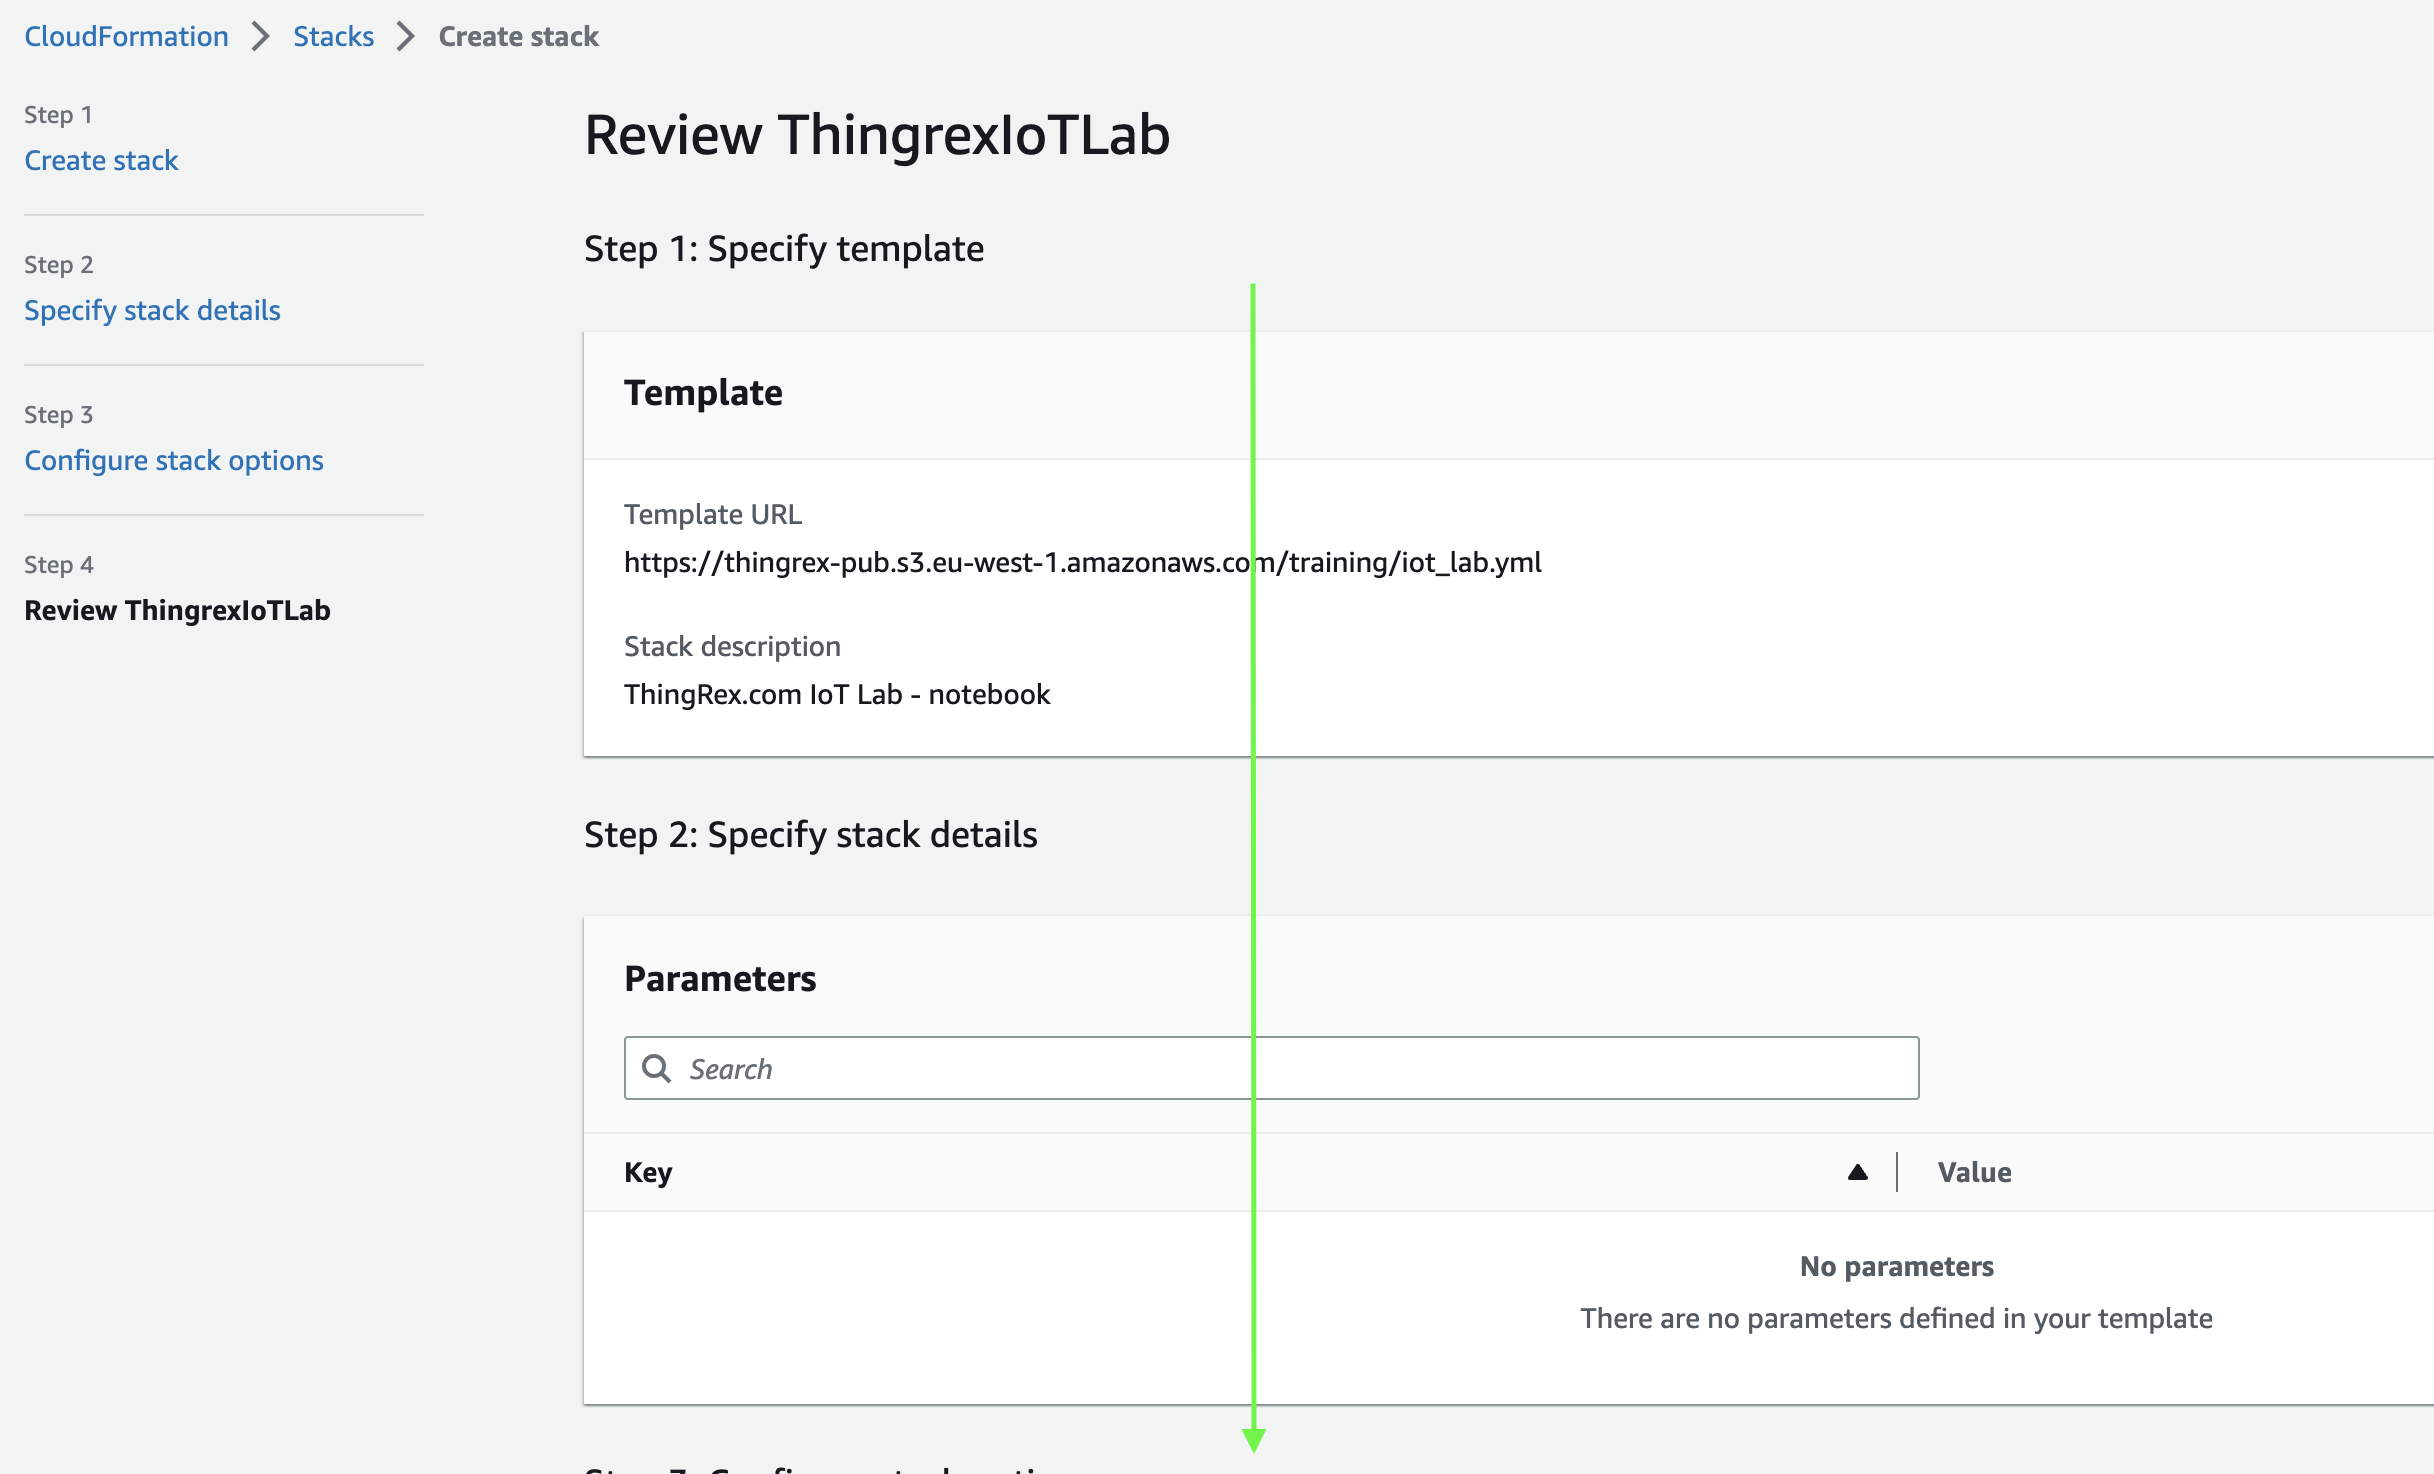
6 ) Scroll to the bottom of the “Review” page:
and acknowledge that AWS CloudFormation might create IAM resources. The ThingRex IoT Lab requires an IAM Role to manage AWS resources.
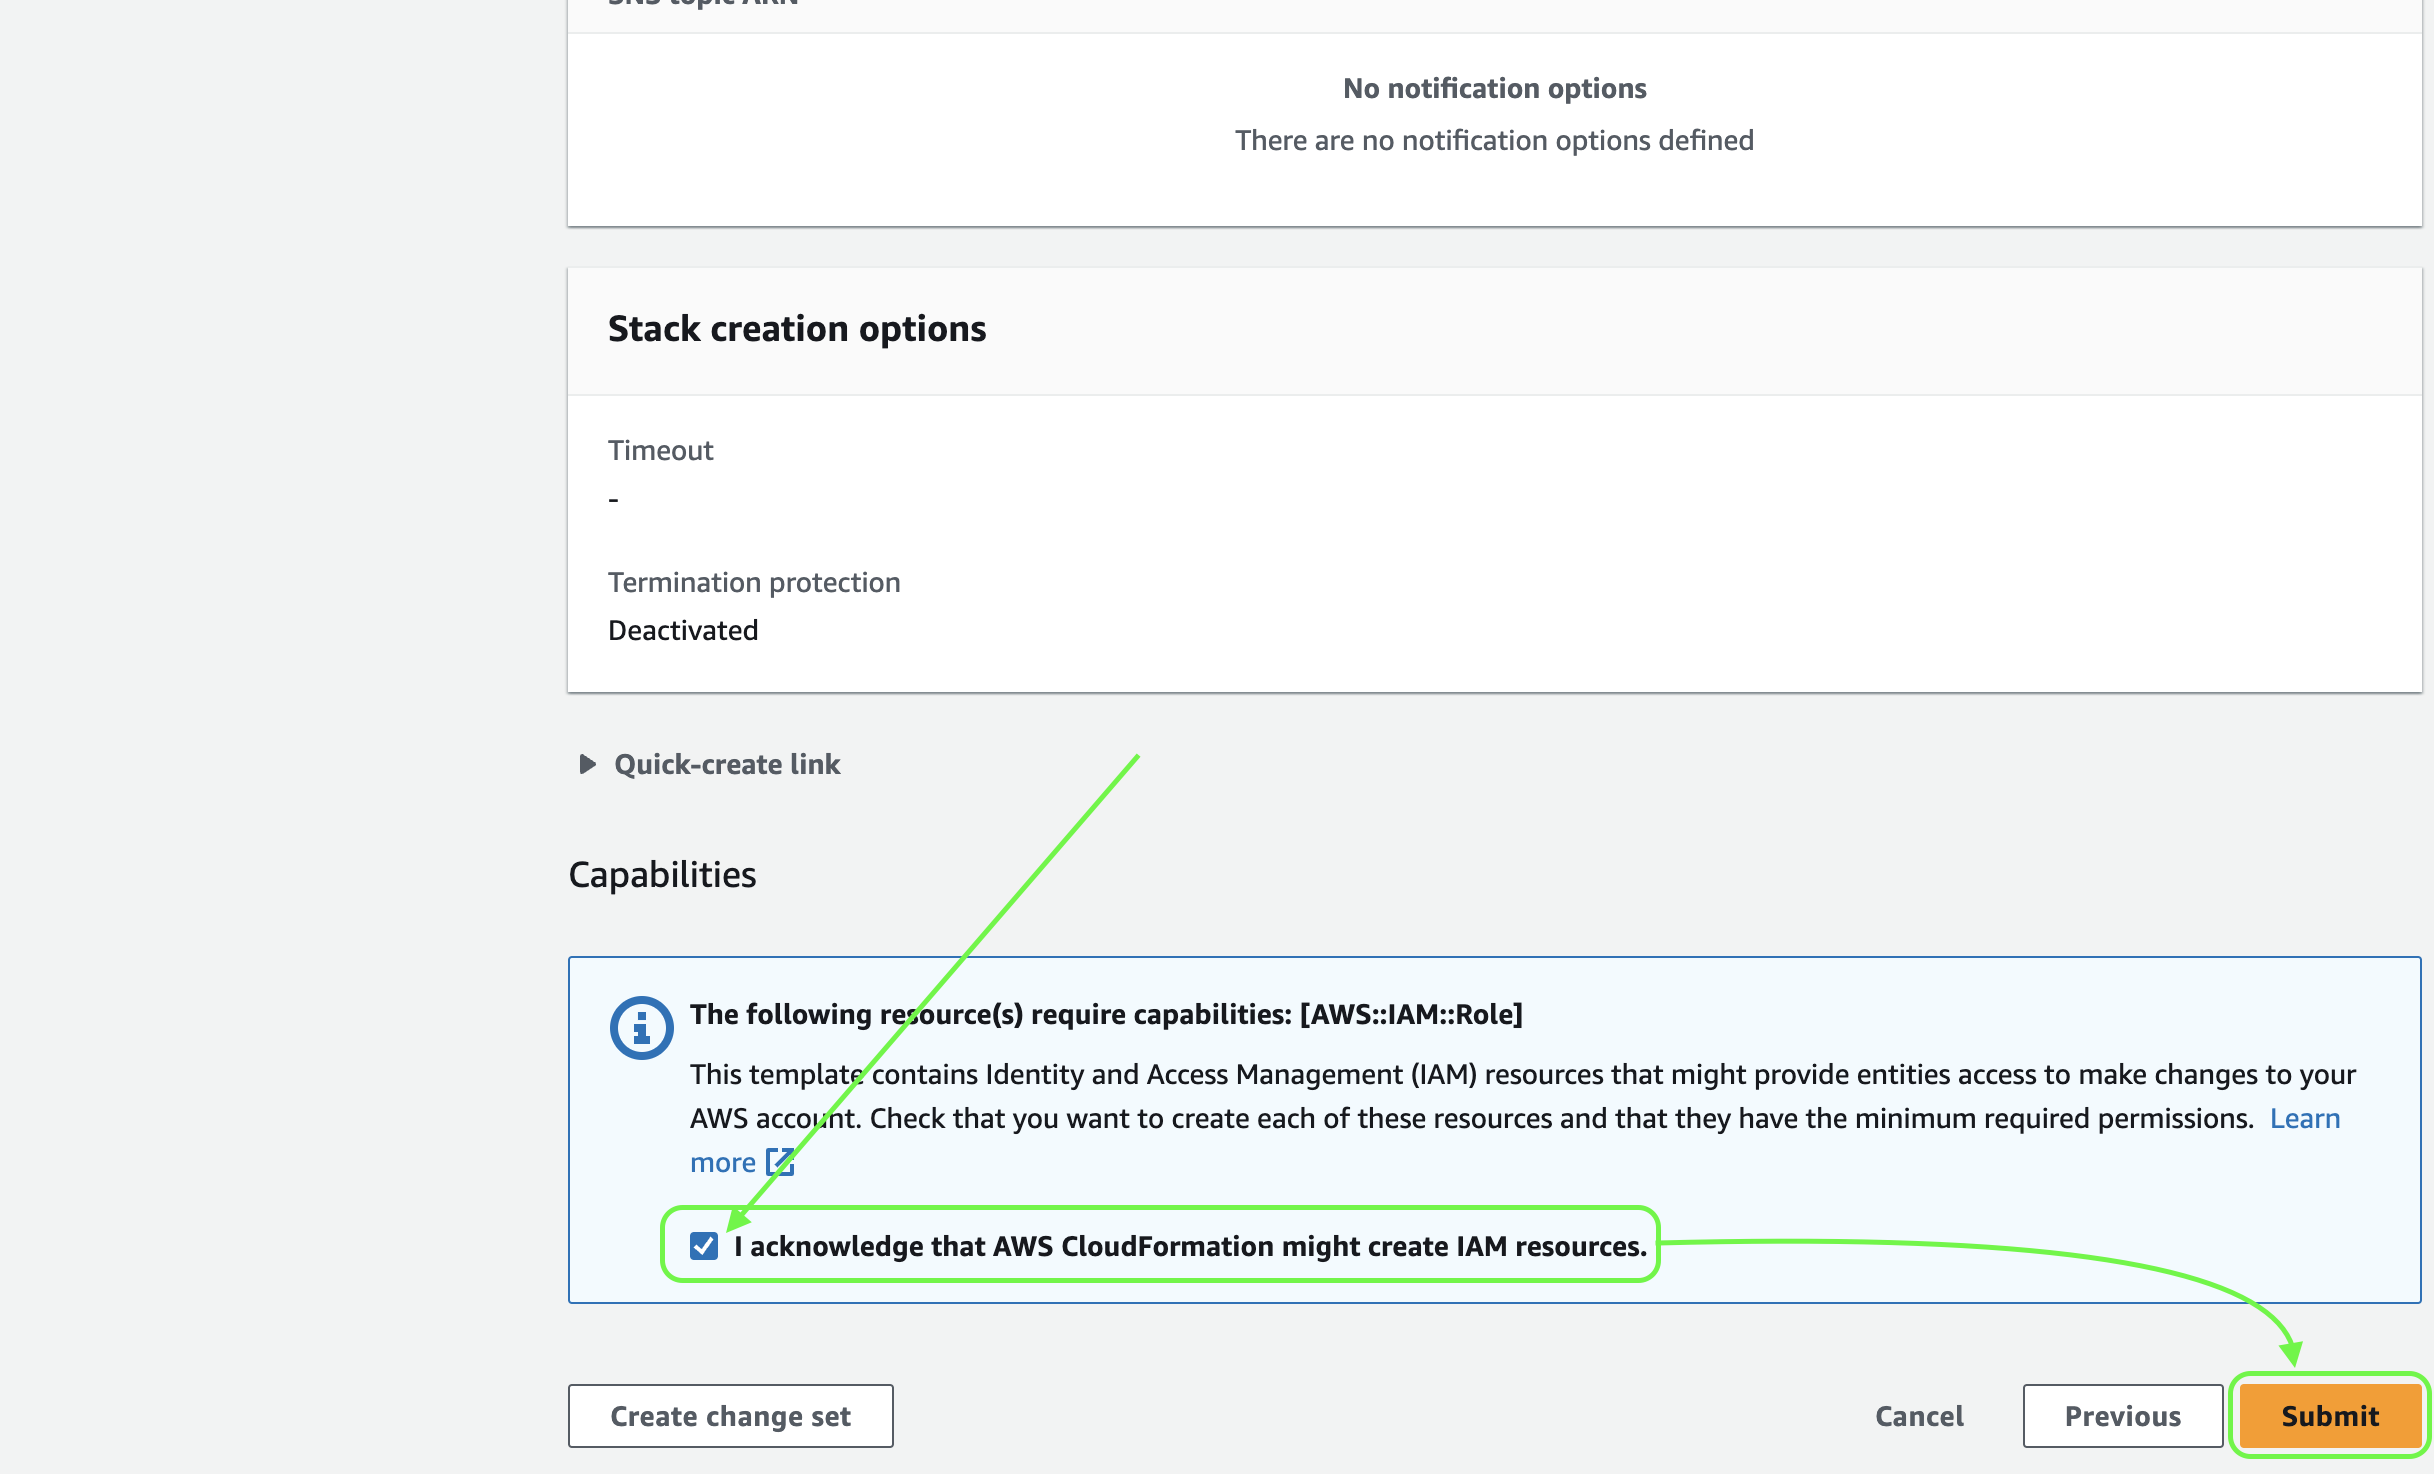
7 ) The ThingRex IoT Lab deployment started.

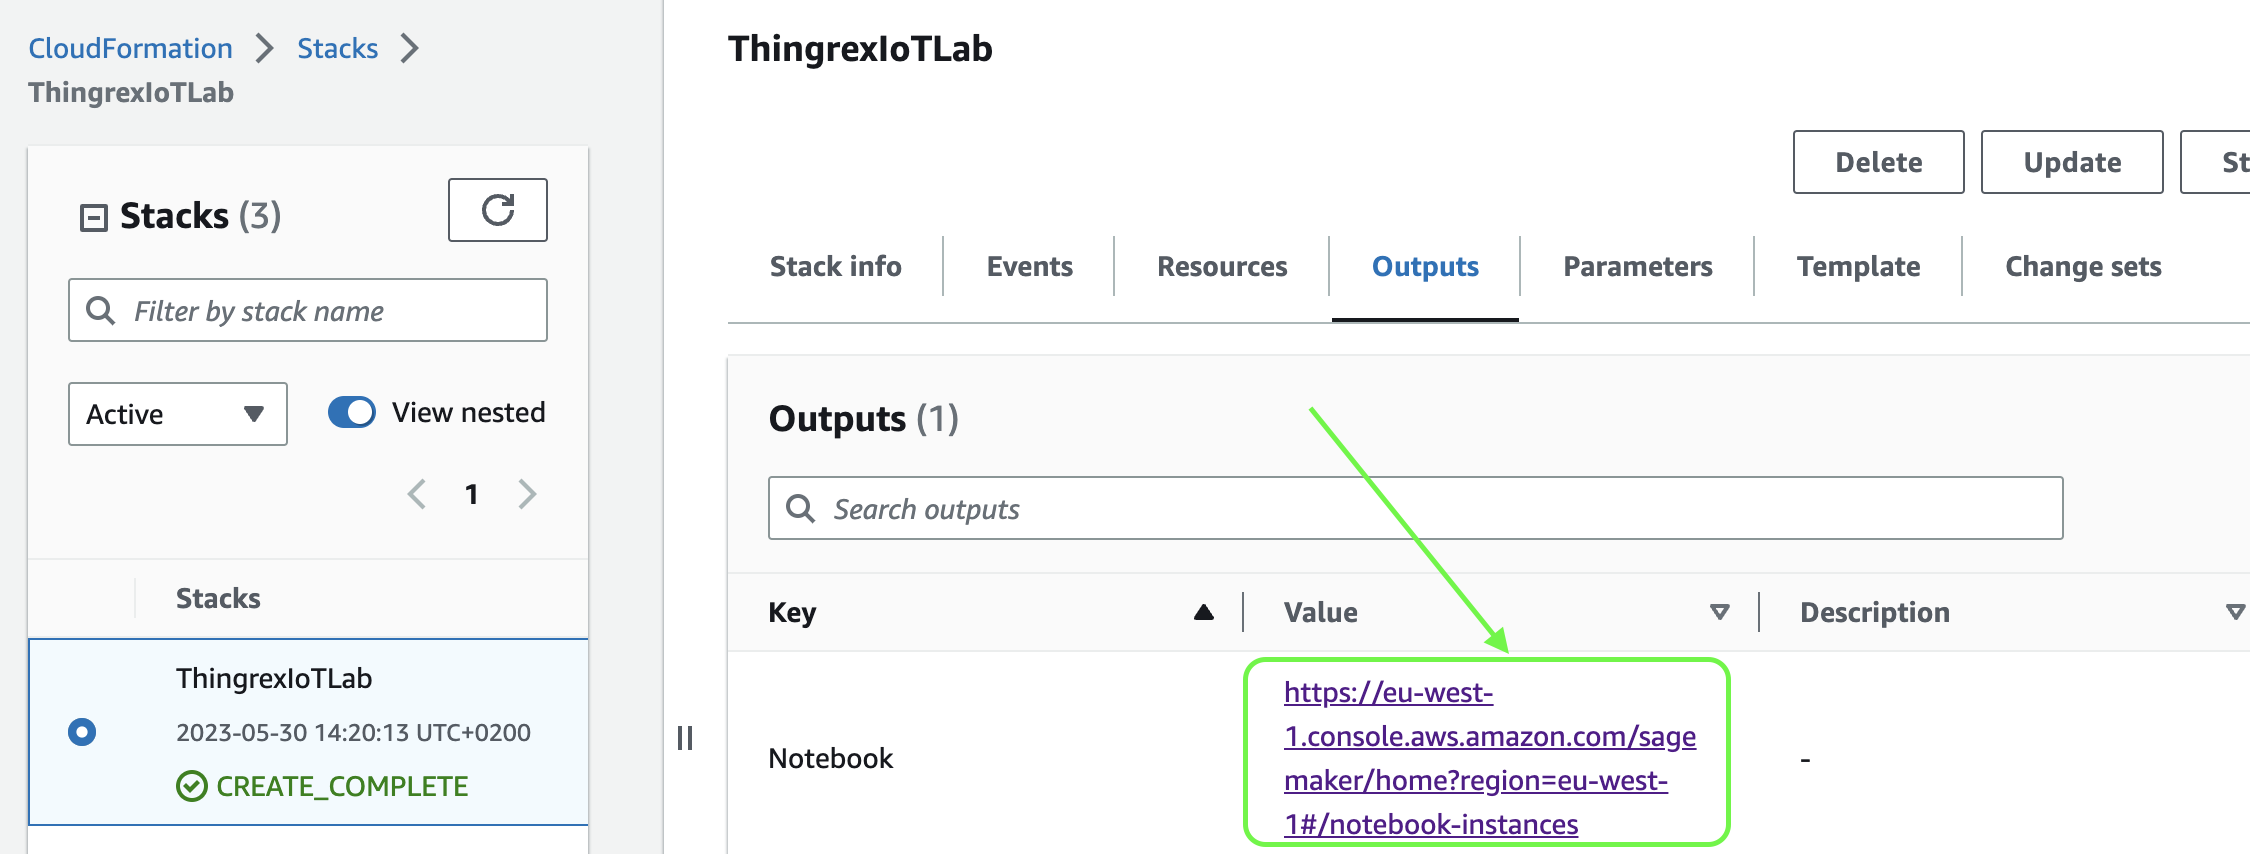
8 ) Wait till your environment is created and go to the “Outputs” tab.
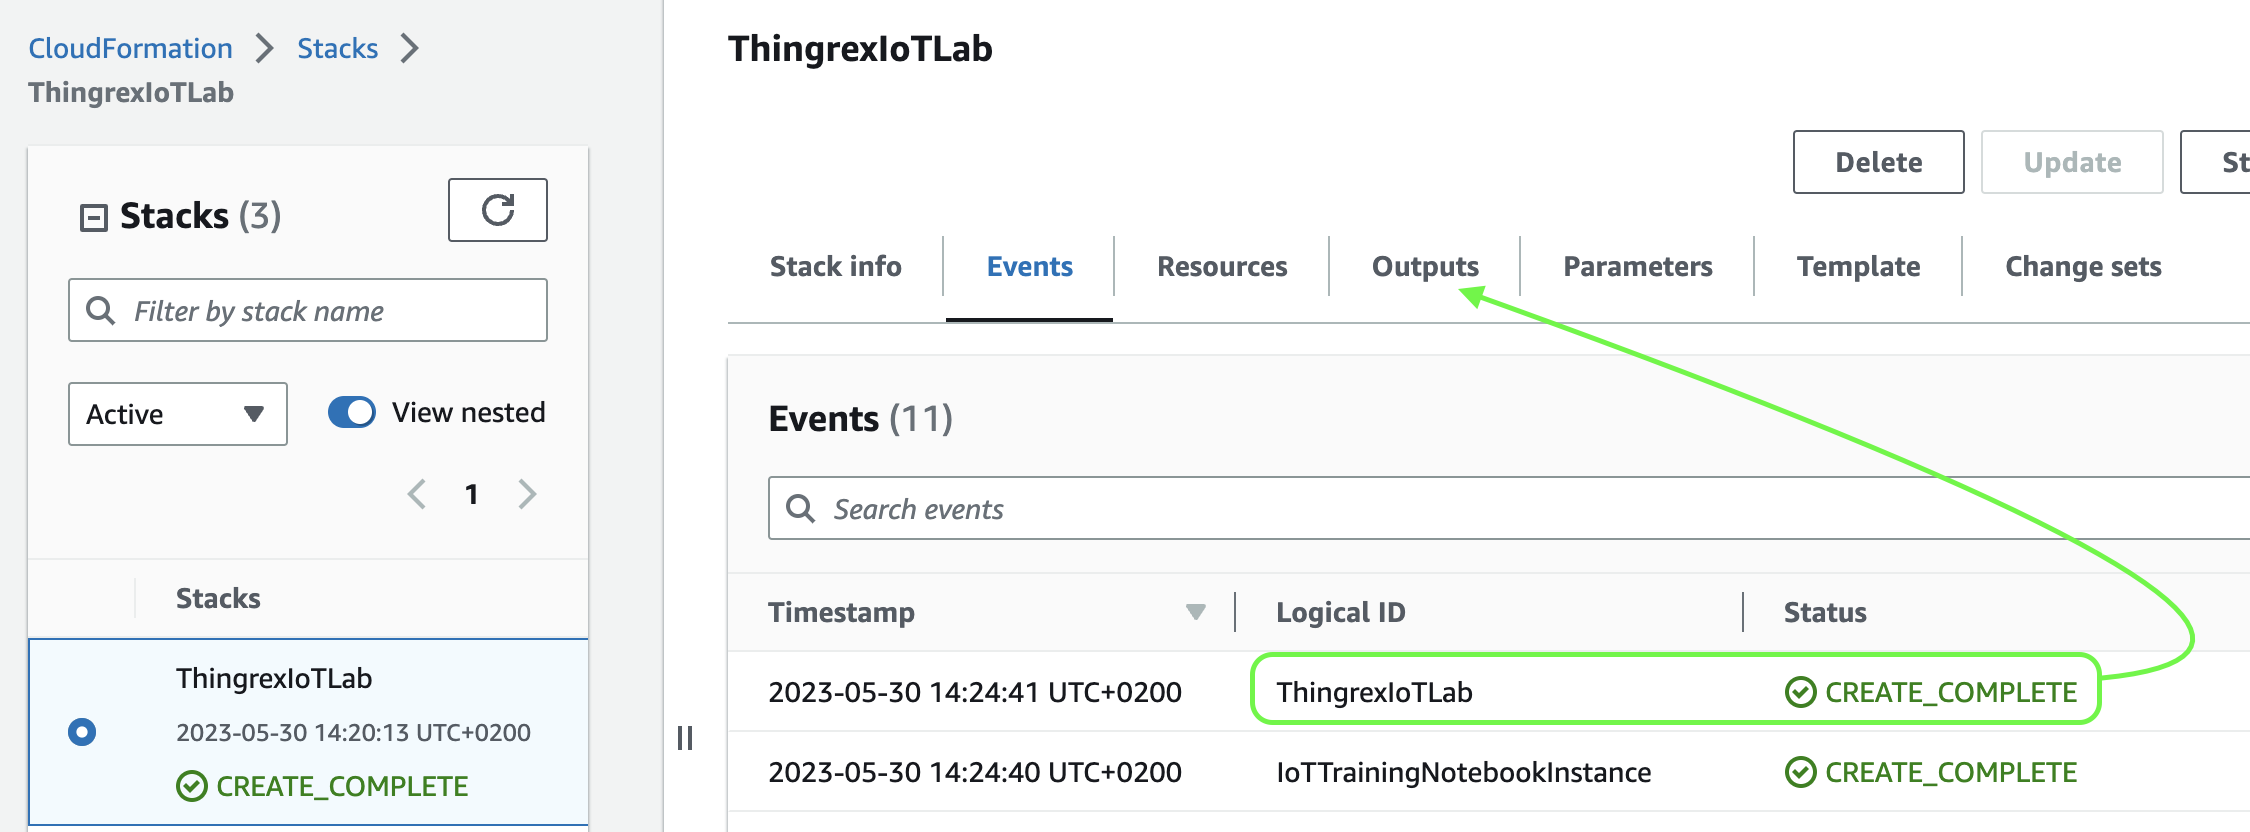
9 ) Use the “Notebook” link to access your lab:
10 ) Open the JupyterLab Notebook:

11 ) Your environment is ready!
Your First Notebook
Create your first notebook.
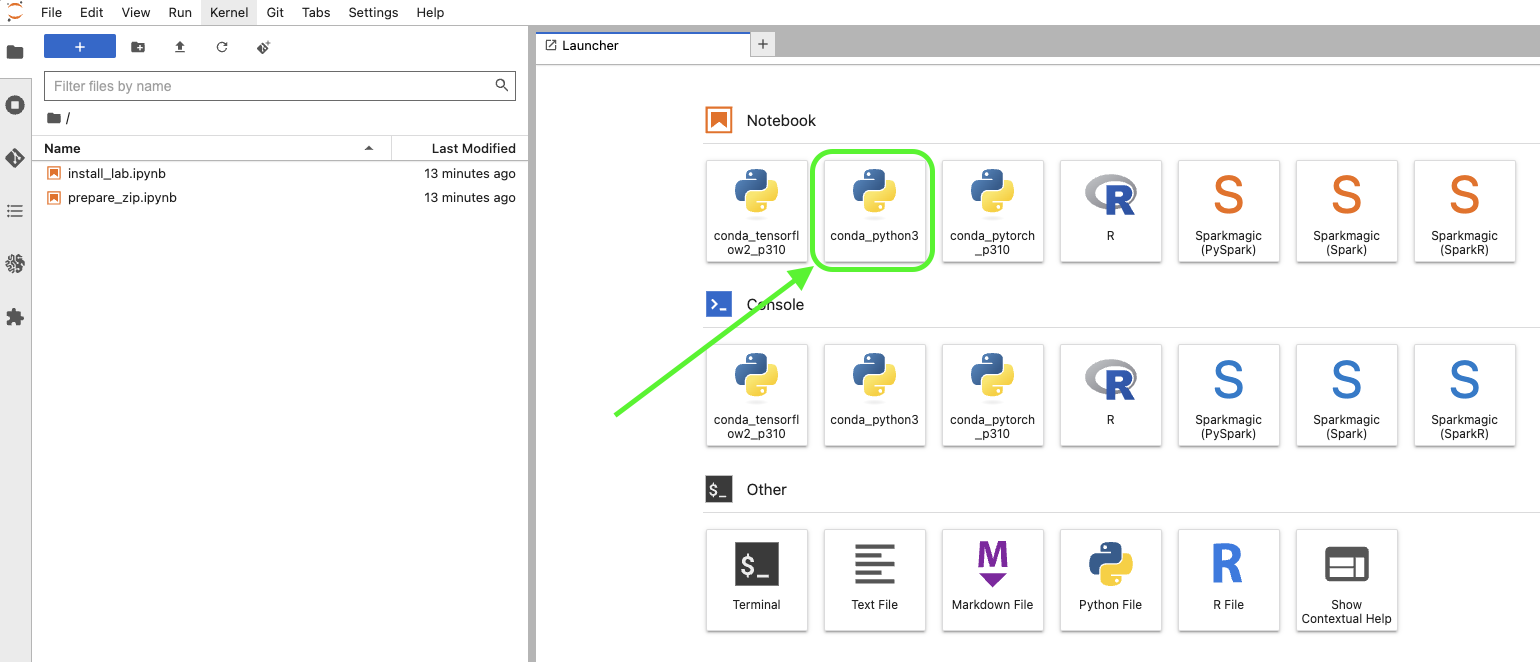
IMPORTANT: Use the conda_python3 kernel!
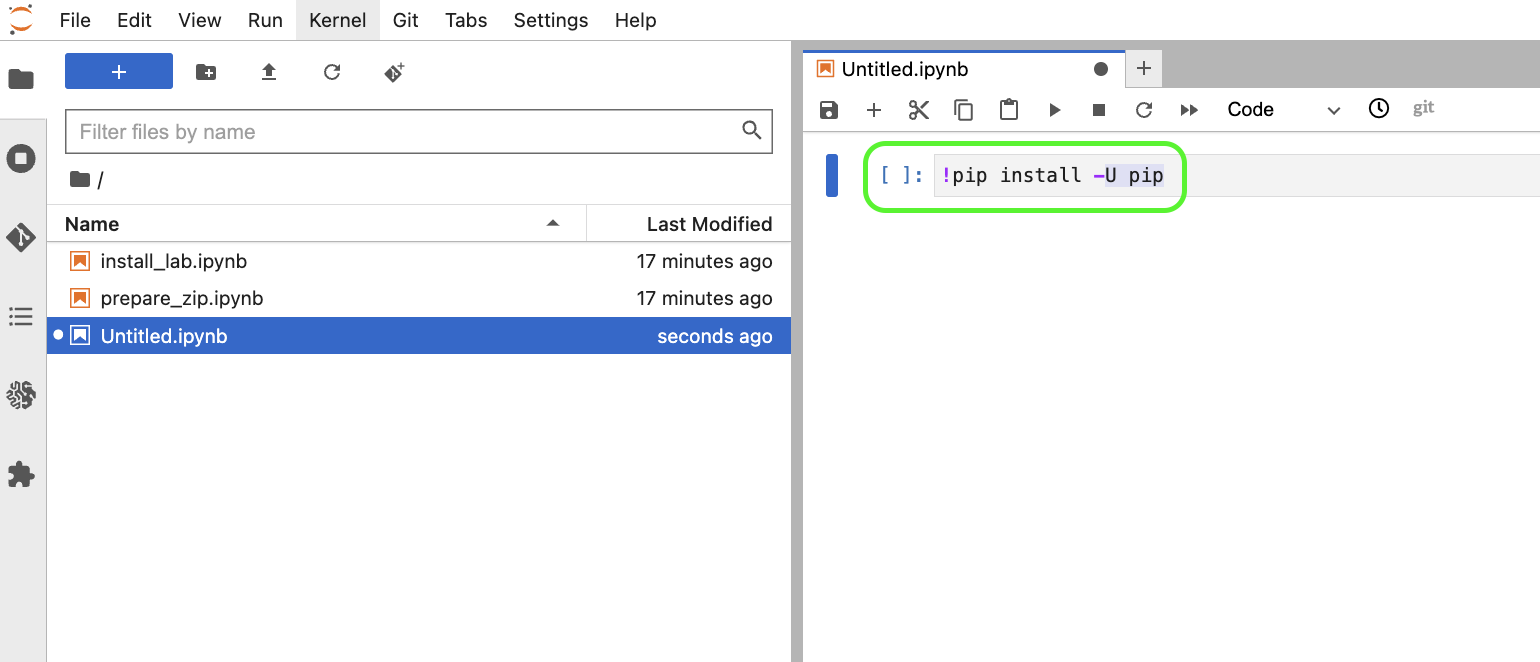
Before working with AWS, we need to upgrade the package manager (pip).
Type the following to the code cell and execute it.
!pip install -U pip
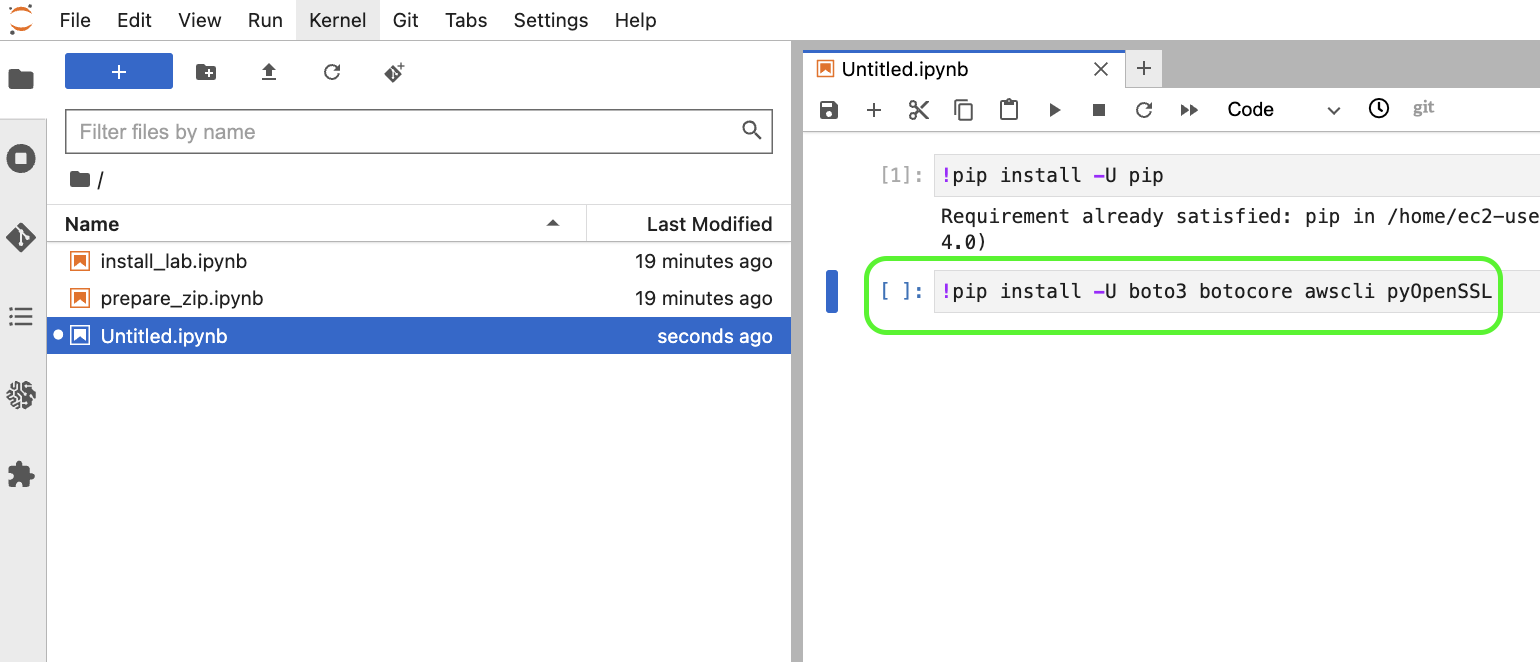
Then, install required packages.
Type the following to the code cell and execute it.
!pip install -U boto3 botocore awscli pyOpenSSL
Now, you are set to work with AWS!
Training Materials
Once you created the ThingRex IoT Lab, you can upload my training materials or use the demo session.
Demo session: https://thingrex-pub.s3.eu-west-1.amazonaws.com/demo_session.zip
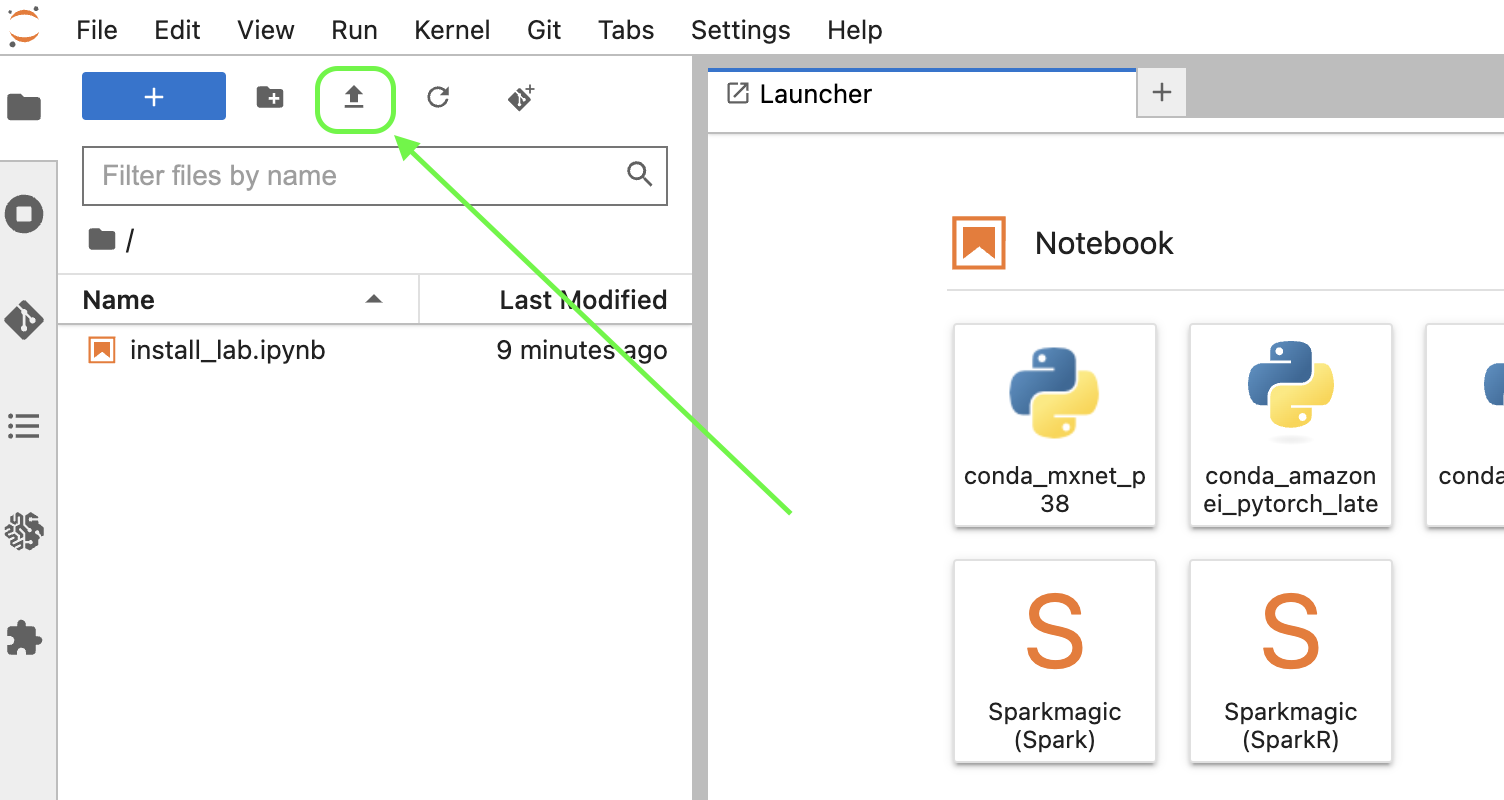
Double-click on the install_lab.ipynb notebook to open it:

Click on the play icon to execute the cell and install training materials:
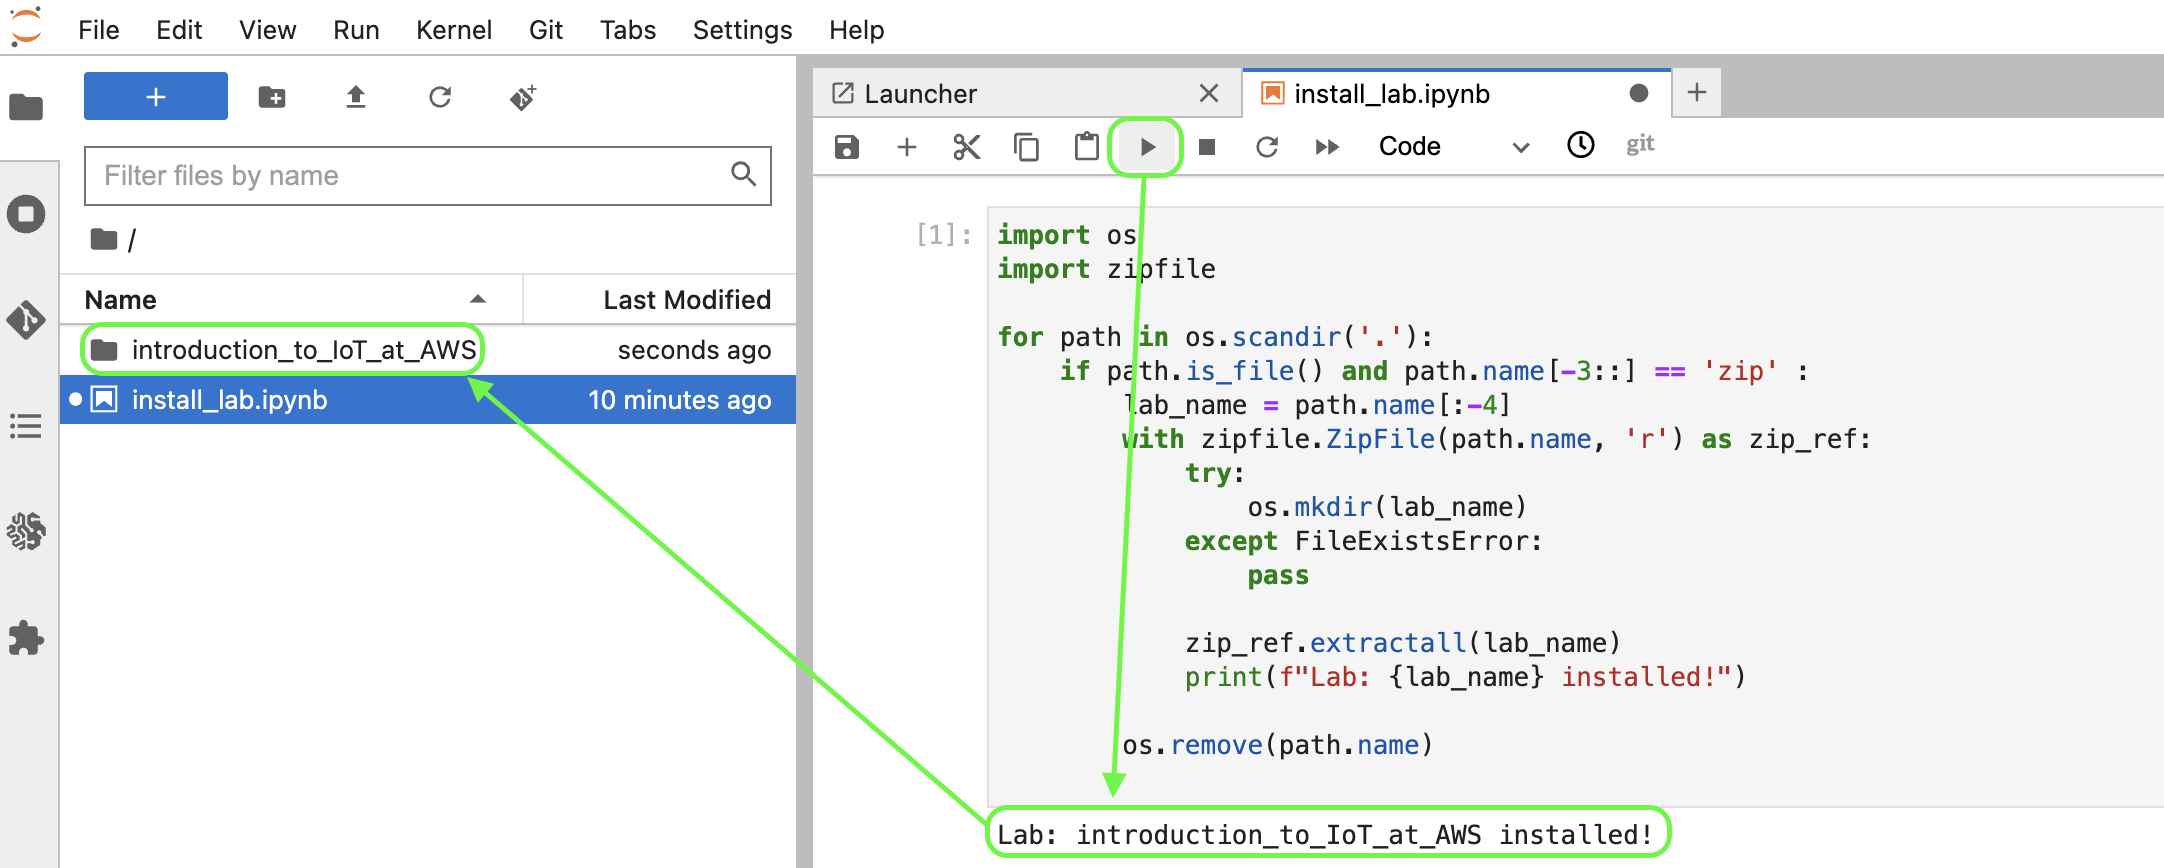
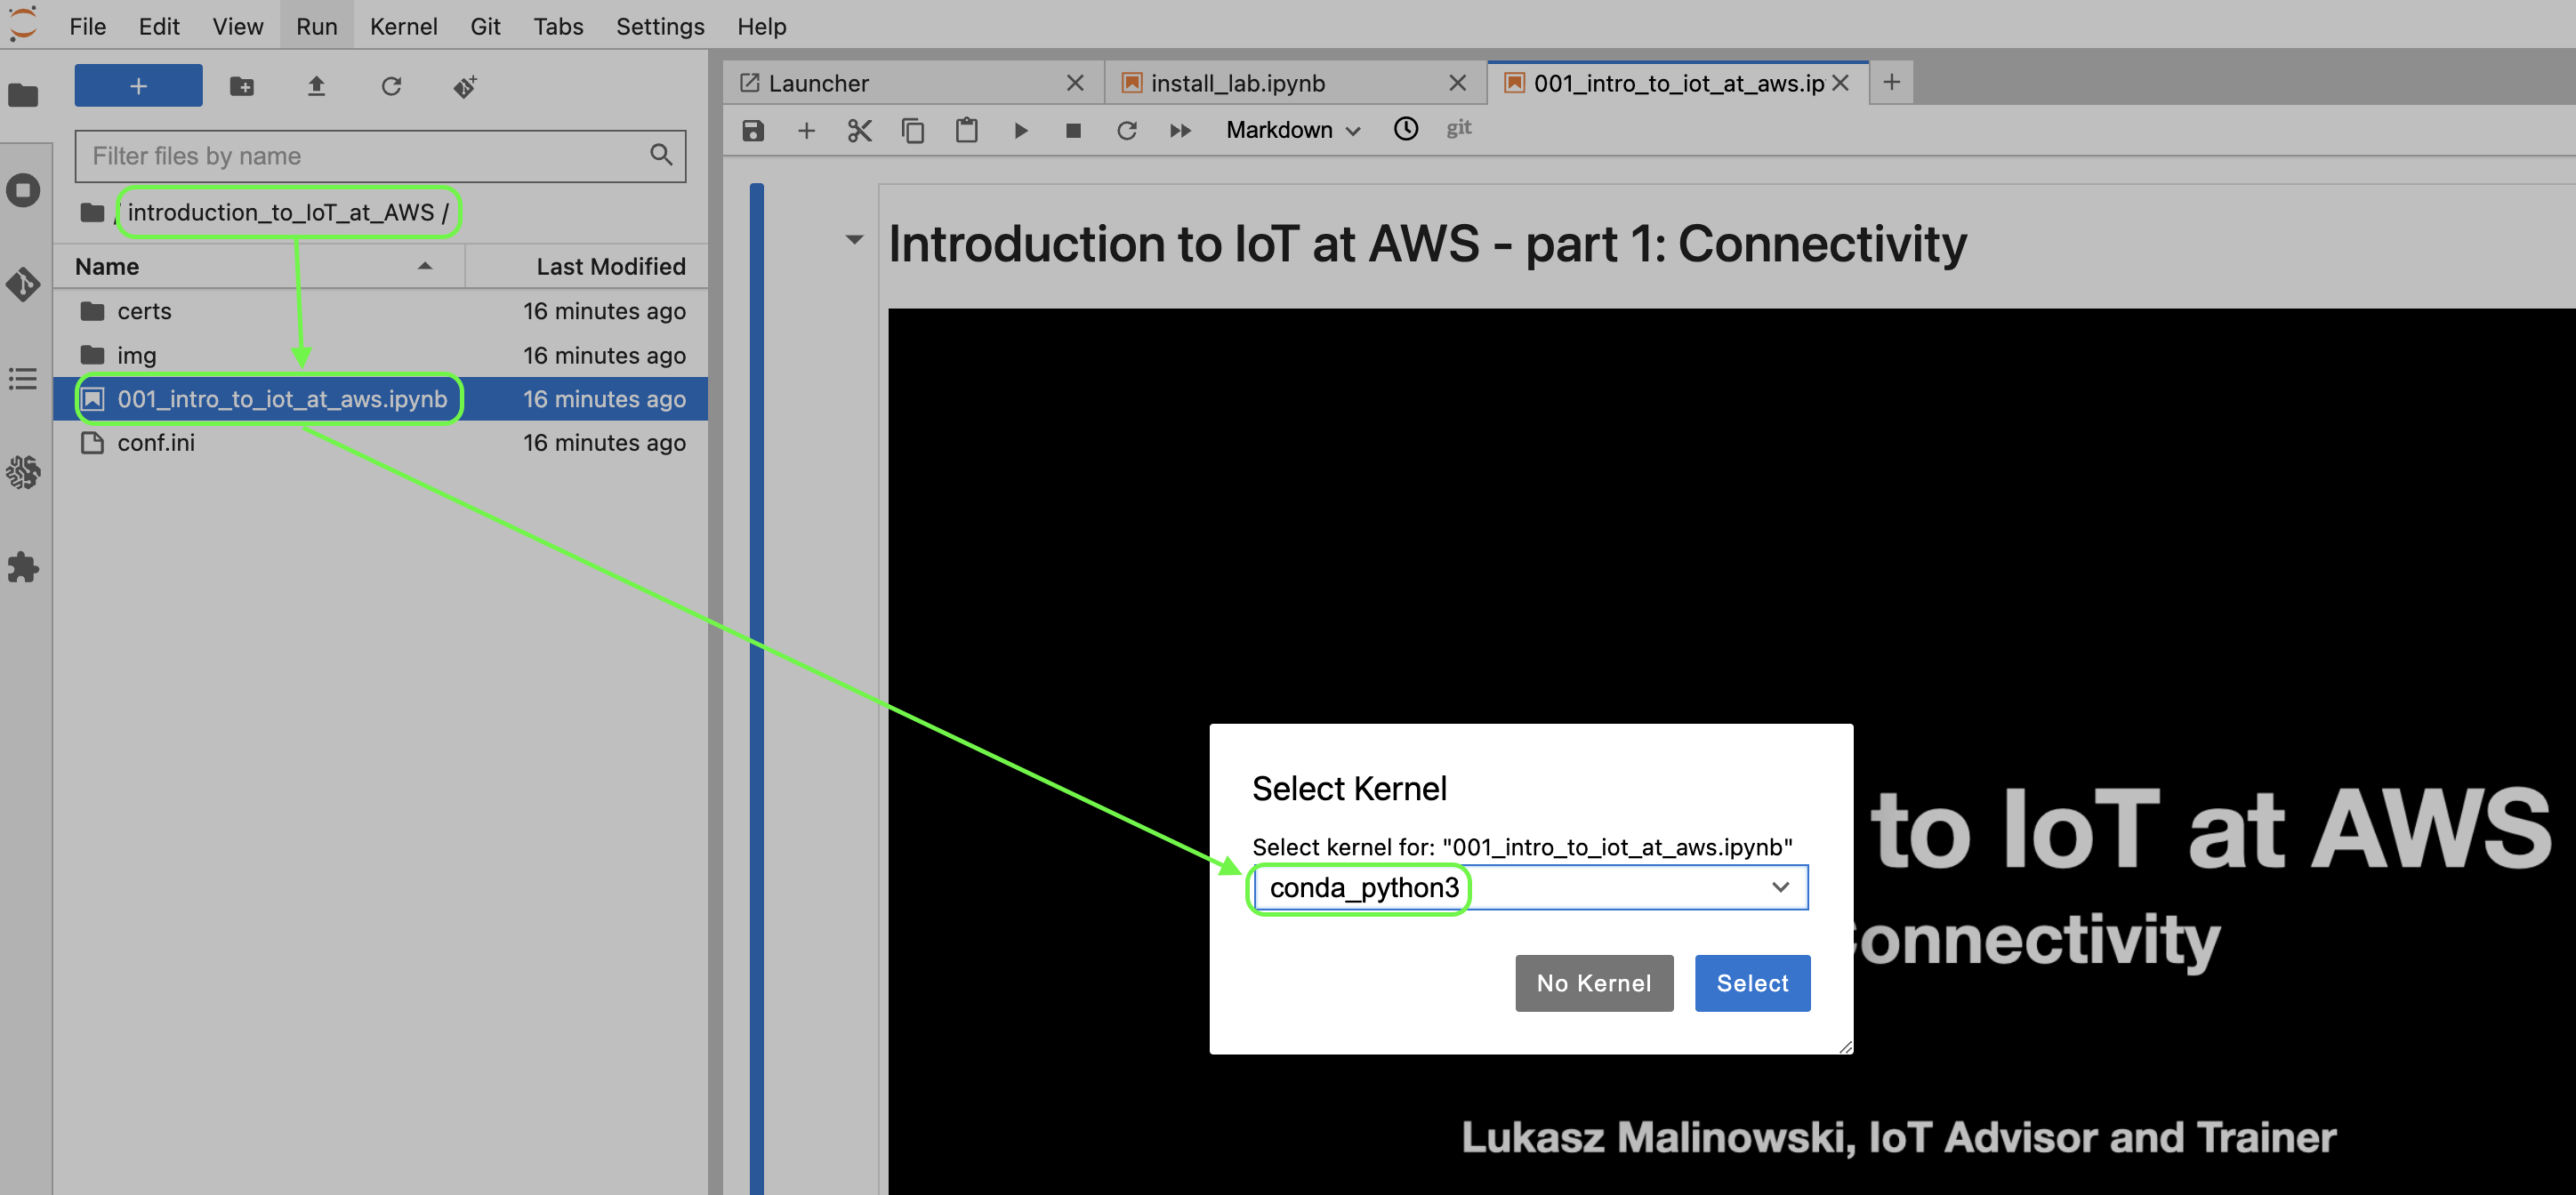
Open materials and enjoy your training!
Important: Select the conda_python3 kernel.
Download your work
Remember to save your work and download materials at the end of your working session.
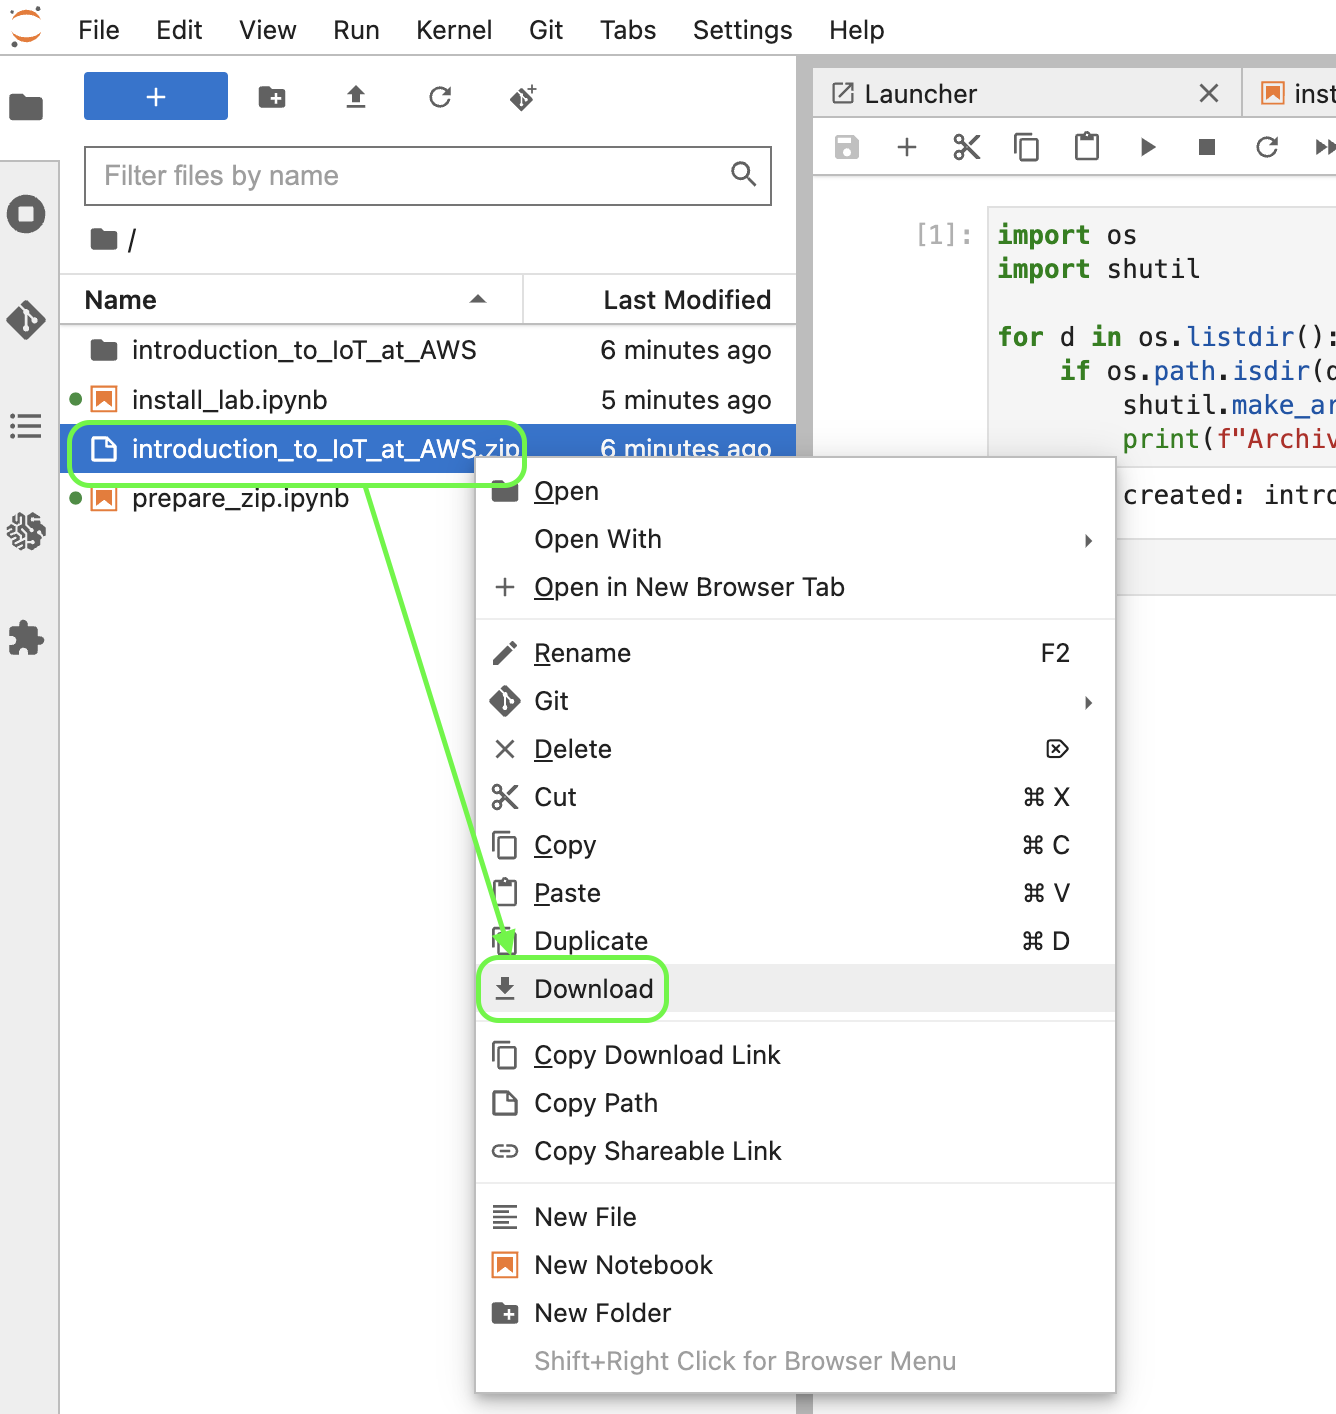
Invoke the prepare_zip.ipynb notebook to create an archive of the training materials:

and download that archive on your drive:
Right-click on the .zip file and select Download.
Stop environment
Stop your lab environment to avoid additional costs when you are not using it:
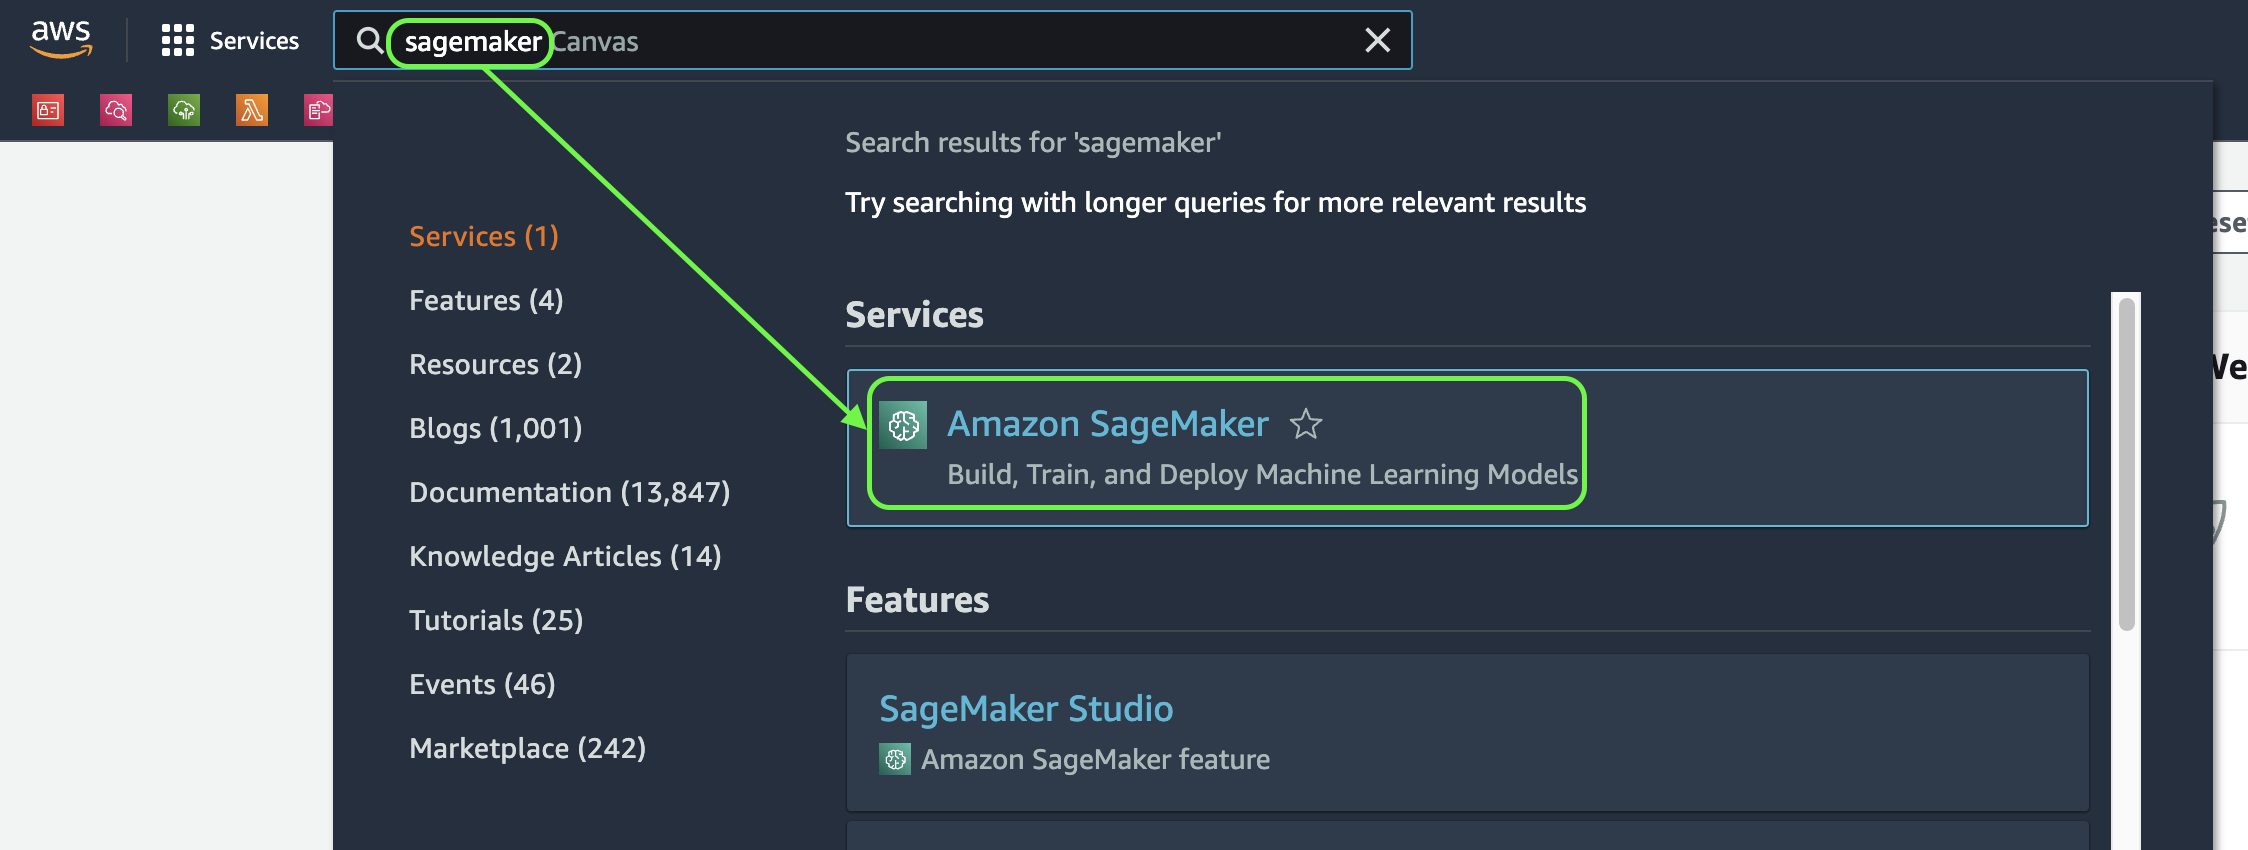
Search for the sagemaker service:
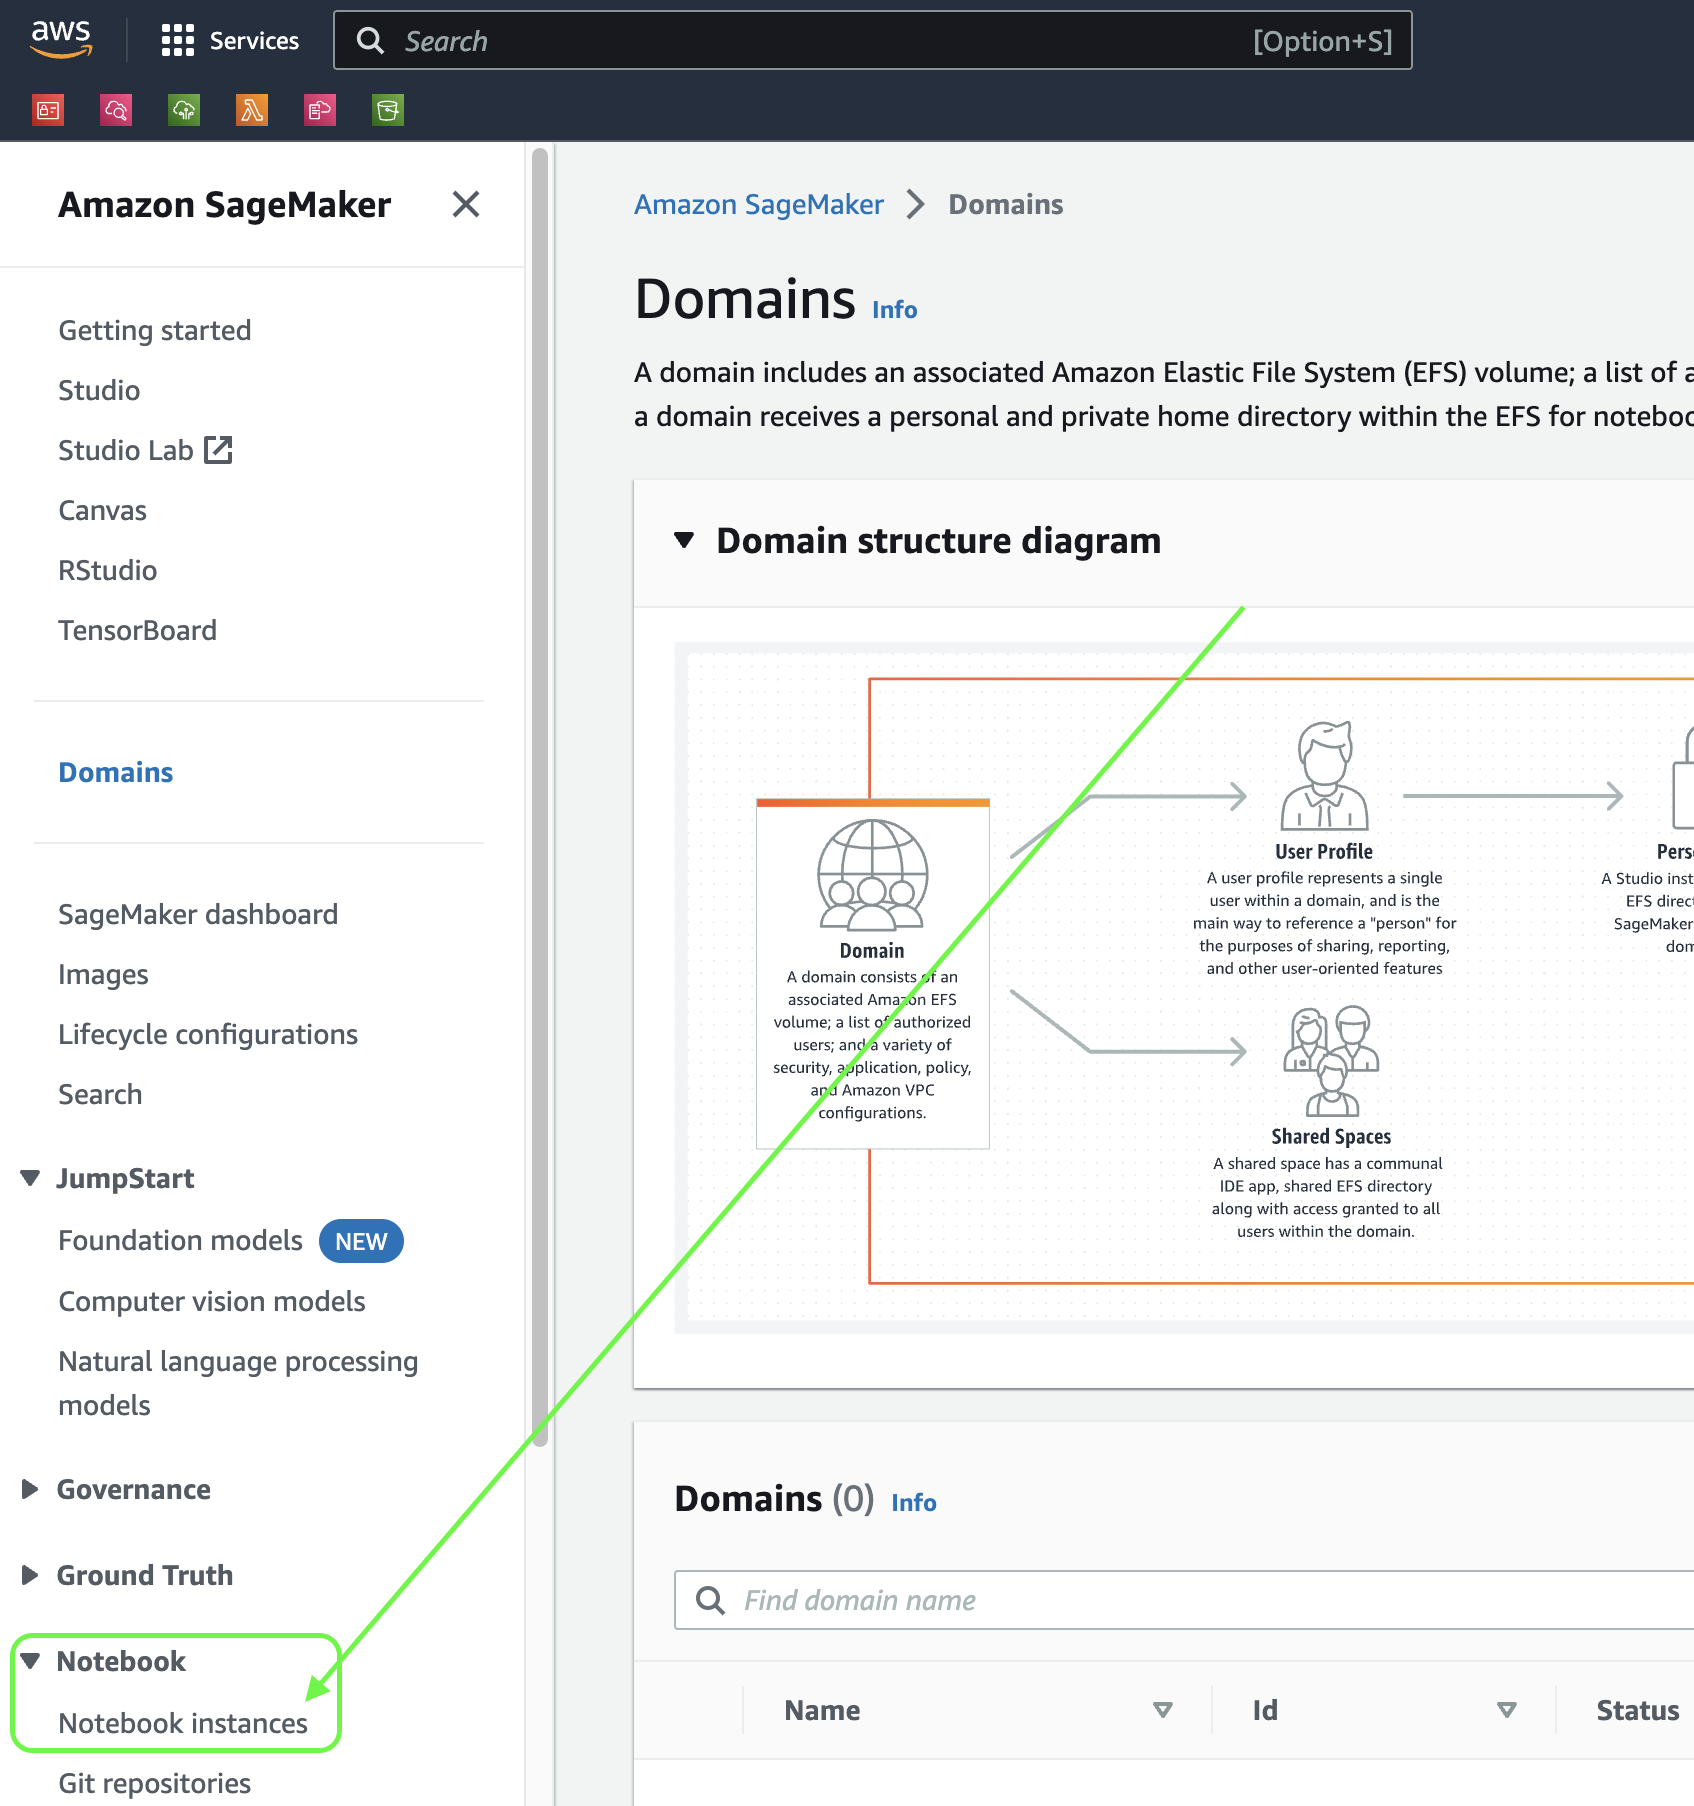
navigate to the Notebook instances:
select the IoTTrainingNotebook instance, click on Actions, then Stop.

Re-start stopped environment
To re-start a stopped environment find the IoTTrainingNotebook instance using the above steps, then invoke the Start action:

Select the conda_python3 kernel.
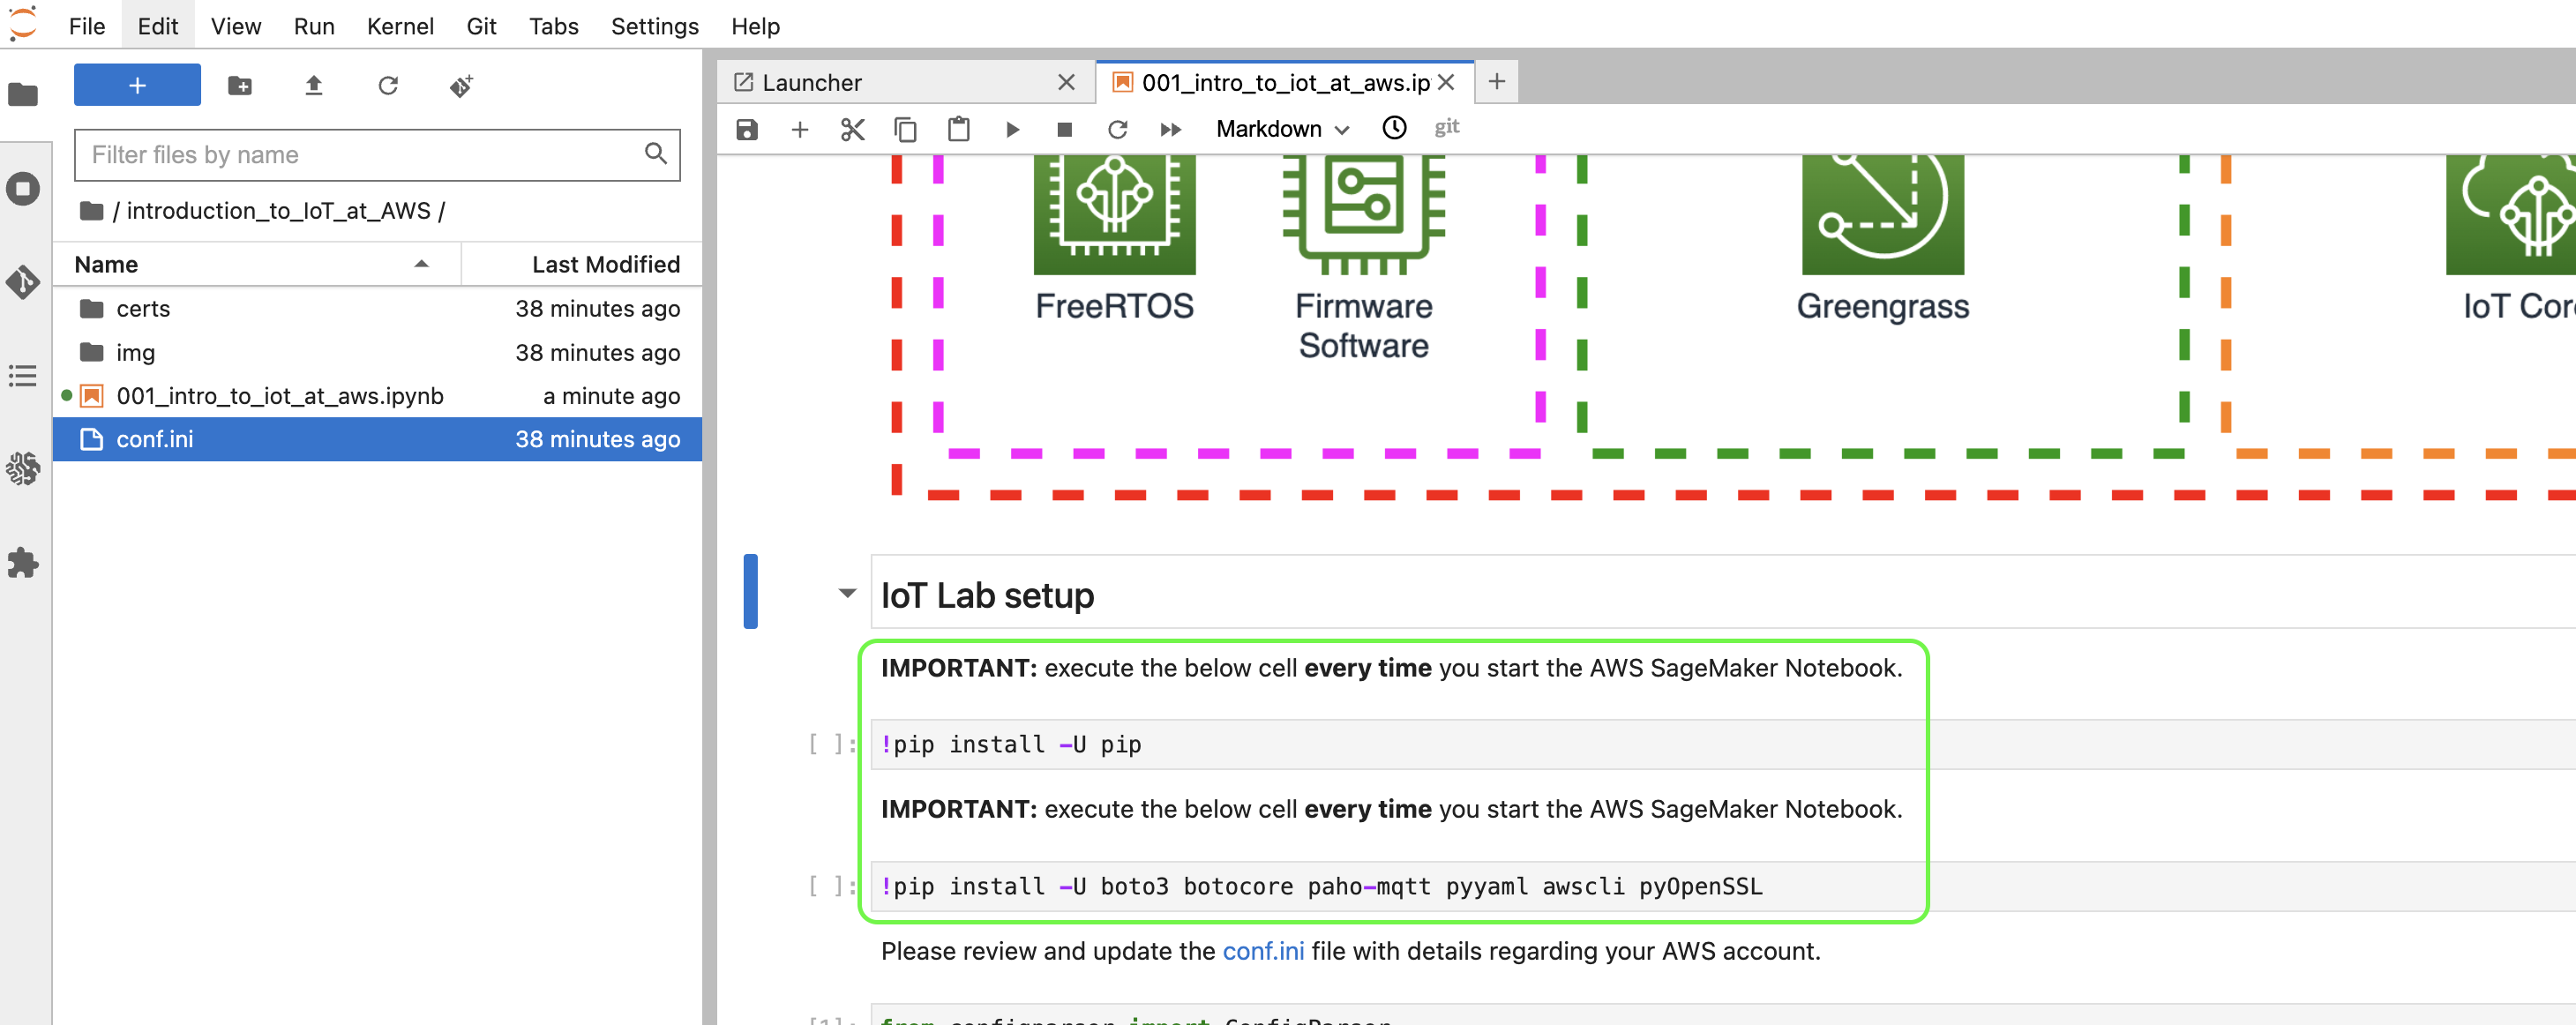
IMPORTANT: Remember to execute the marked cells in the IoT Lab setup section of the notebook every time you re-start your environment!
Permanently remove the IoT Lab
To permanently remove the IoT Lab infrastructure search for the CloudFormation service:

and destroy the ThingRex IoT Lab stack:

